So it had been quite a long time since I had decided that I need a fully functional portable environment that can be used anywhere, anytime and in every possible way. I believe that I had did this before, around 1 year ago, when I deployed a few stuff onto my flash drive and oops, the free space was not sufficient. Yet half of the space of my thumb drive was consumed deliberately and it still made no sense.
It would be apparent that people who own devices of large storage spaces, should not be worried about the empty space problem, had their flash drives be stacked with several hundred gigabytes or a few terabytes. But people like me, who own small ones, like the Sandisk Ultra which I fixed a few months earlier, that contained no more than 14. 7 GiB.
The entire process was devastating, and by no less than a dozen and a half repeated wrongdoings had I tried, in order to proceed to the final step. The time would be longer should I not have backed up the data created midway. Some of the data were lost, and some did not. I recalled having the installation ran for around 20 times, while half of them required a full disk wipe (for clearing up the disk of course). Backing up of the Btrfs filesystem, either in partition image, in subvolume dump or in tar archives, would also have counted to ten.
No matter how the process had been aggrieving, the results were astounding and satisfying. One may realize the importance it brings, and the efficiency it dedicates. Having such a device would certainly be helpful, such as operating system failures and development-on-the-go. These are a few screenshots used to demonstrate the results of this deployment, in hope that they might impress you:
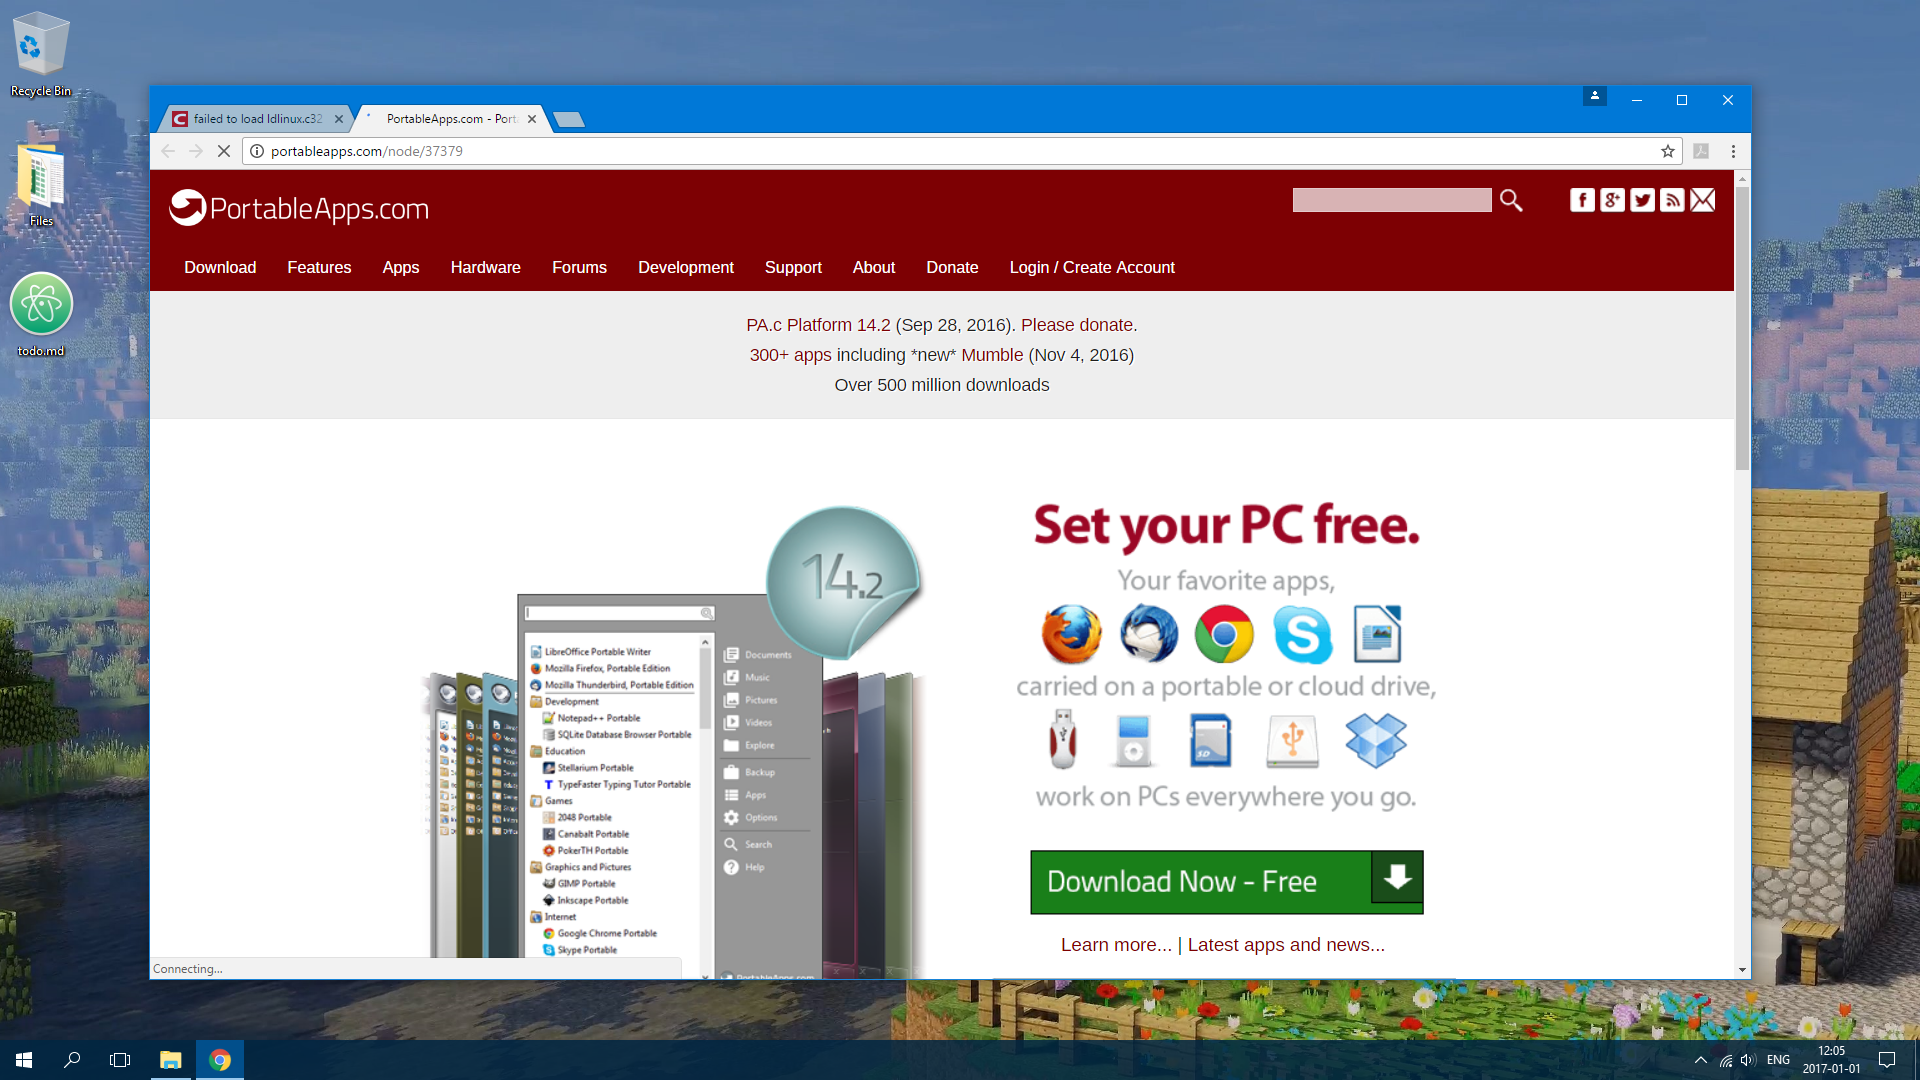
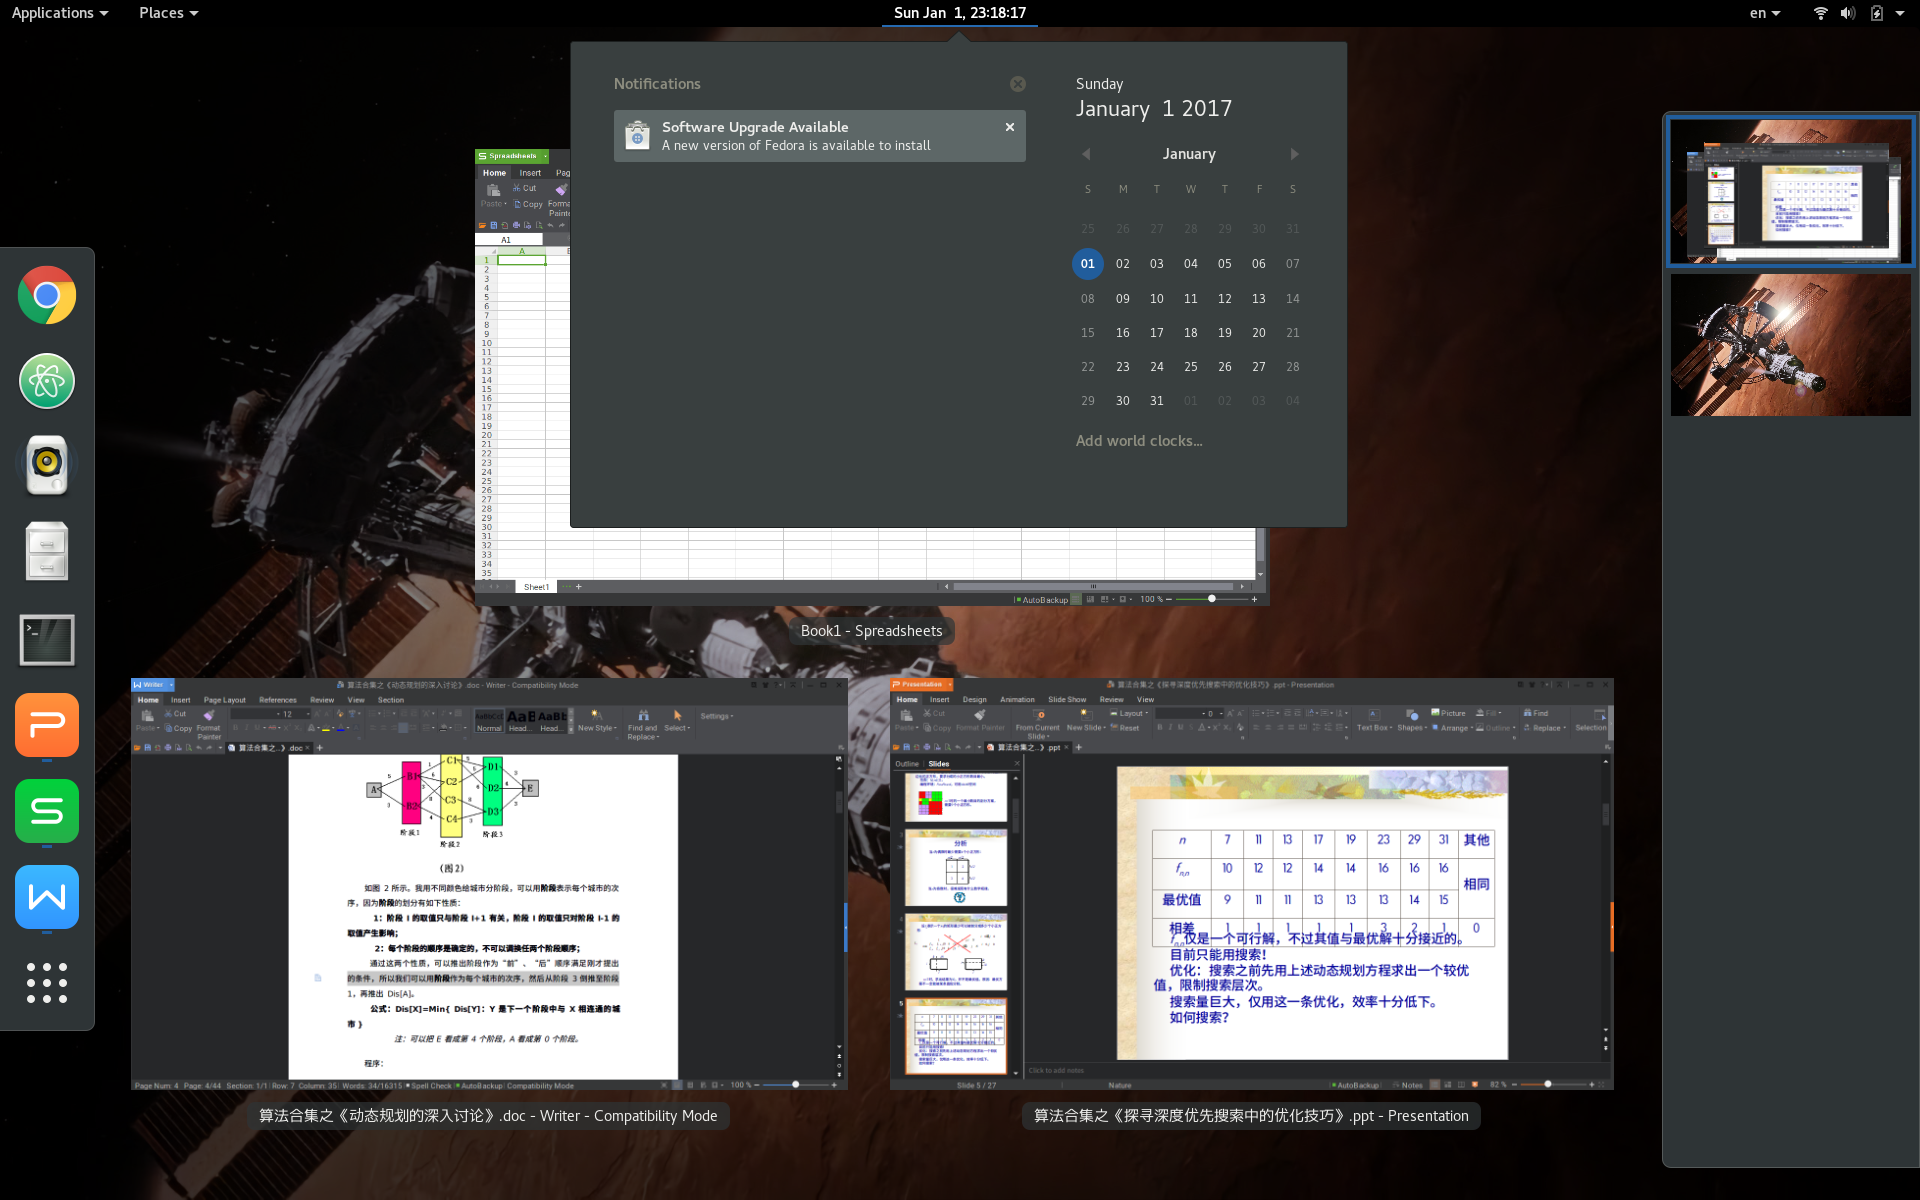
If you had interest in this process, or if you would like to make one yourself, you may refer to the rest of this page by expanding the content. Note that the drive should not contain critical information or files of great importance. Any damage the following procedures dealt to your disk are entirely out of the author ‘s control and I take no responsibilities for the potential consequences.
Failed Attempts
Most people would not be interested in this section. But to remember the failures that I had encountered, and make people understand that these approaches are not correct and would definitely result in failure, I decided that it would be better to leave them here. If you really aren’ t interested in this section, simply skip it.
Attempt #1
I successively tried a great many distributions of Linux images, while none of them happened to work. Most of them resulted in the error message:
syslinux 5.10: failed to load ldlinux.c32Indeed the file ldlinux.c32 is present on disk, and by trying all the possible file of the same name in different GNU/Linux distributions I have reached a conclusion, that it has nothing to do with the individual distributions (or a high unlikeliness to be), but the image burner or the flash drive itself.
So I refered to a few documents or questions on the Internet, and this blog post turned out to be quite a nice solution:
http://blog.csdn.net/fireroll/article/details/46744525
用 UltraISO 制作 Ubuntu 或 Debian 的 U 盘启动盘后, 在机器用 U 盘启动时有时会报这个错误: failed to load ldlinux. c32
是因为 UltraISO 的问题, 需要换刻录软件; 请换刻录软件 linux 的用 mkusb, windows 的用 Win32DiskImager
具体用法: https: //wiki. ubuntu. com/Win32DiskImager/iso2usb https: //help. ubuntu. com/community/mkusb
I have to clarify myself hereby, that I am not using non-genuine software due to the fact that these softwares such as PowerISO and UltraISO are currently under trial period.
Therefore I abandoned UltraISO and turned to PowerISO for help. This immediately solved the problem, and the Linux Live CD is now bootable (again). I believe that it would not be necessary to have a security penetration testing system in my pocket, so I gave up Kali Linux (while the most important reason is that it was too big). While Fedora 25 Workstation had some issues with the anaconda installer that resulted in some terrible segmentation faults, I falled back to Fedora 24 Workstation. The image is relatively small, and only a mere 1. 6 GiB.
Attempt #2
In fact I did not install Fedora to the drive this time, only to test out a few outstanding Linux features, such as partition compression and LUKS partition encryption.
At first it seemed that Btrfs did not support encryption (And it certainly did not). But considering all the implications I figured out that neither did Ext4 support encryption in one way but under the LUKS container (Actually it might be an LVM container that had a LUKS header), it supported encryption. Searching through the web I found a Gentoo Wiki page that described exactly how to create a bootable, encrypted, compressed Linux installation.
https://wiki.gentoo.org/wiki/Full_Encrypted_Btrfs/Native_System_Root_Guide
Basically this article is an extension to Btrfs/Native System Root Guide which adds Dm-crypt and uses Dracut to create the initramfs rather then dealing with the Early Userspace Mounting approach. As the root partition, which also includes /boot, will end up encrypted, we ‘ll store the keyfile to unlock the btrfs raid partitions within the initramfs. This may be a bit unsafer on runtime as the keyfile ends up in memory but we gain a faster boot process without the need to input the password 4 times (2 x grub and 2 x btrfs raid1). I also have an btrs raid6 with 6 full encrypted disks and this would lead me to enter my password 10 times to have a fully working system. so i’ m happy with embedding the keyfile within the initramfs.
As i didn ‘t find a way to get a working system with the initramfs generated by genkernel I’ ve decided to use dracut.
We ‘ll migrate an existing MD software raid1 to an btrfs raid1 without adding extra disks. So better make backups of your data! I assume the raid members of /dev/md1 to be /dev/sda and /dev/sdb.
The whole procedure is straight forward but you have to double check a few things i’ ll mention later. Please carefully read the whole post and pay extra attention to grub2 and dracut.
There may be better ways to accomplish this setup but after nights of research and testing within a virtual machine this procedure has worked for me.
Preparing Encryption
As we ‘ll use a keyfile to unlock the partitions we’ ll now create one (paranoid settings). Since some computers don ‘t support hardware random or don’ t contain supported TPM modules, we are using /dev/urandom instead.
[root@liveuser ~]$ dd if=/dev/urandom of=/root/secretkey bs=1 count=4096
[root@liveuser ~]$ chmod 0400 /root/secretkey
Now we have a key to encrypt the drive, but this key has nothing to do with the passphrase. The key to decode the drive, is encrypted with the passphrase and stored in the LUKS header on the partition, which if not provided with the correct passphrase would not be able to turn into a valid encryption key to decrypt the drive itself.
Encrypting Partition
After partitioning the partitions, we create an unformatted /dev/sdc3 area. This area is used to create the LUKS partition, which should, when the climate is right, contain the Btrfs partition. We shall format the partitions:
[root@liveuser ~]$ cryptsetup luksFormat -s 512 -c aes-xts-plain64 /dev/sdc3Next we add the key to the partition.
[root@liveuser ~]$ cryptsetup luksAddKey /dev/sdc3 /root/secretkeyFinally we mount the root partition to where it should be.
[root@liveuser ~]$ cryptsetup open -d /root/secretkey /dev/sdc3 luks-1Creating filesystem, mountpoints and subvolumes
Now we format the mapped partition.
mkfs.btrfs -L System /dev/mapper/luks-1Next we create the mountpoints, mount the filesystems and create subvolumes. Since zlib has a better compression ratio than lzo, and portable devices demand free space, we are using zlibinstead.
# Create mountpoints for first pass
[root@liveuser ~]$ mkdir /mnt/btrfsmirror
[root@liveuser ~]$ mkdir /mnt/newroot
# Mounting and creating subvolumes
[root@liveuser ~]$ mount -t btrfs -o defaults,noatime,compress=zlib,autodefrag /dev/mapper/luks-1 /mnt/btrfsmirror
[root@liveuser ~]$ btrfs subvol create /mnt/btrfsmirror/root
[root@liveuser ~]$ mount -t btrfs -o defaults,noatime,compress=zlib,autodefrag,subvol=root /dev/mapper/luks-1 /mnt/newroot
We wouldn ‘t be needing /home and /boot mountpoints this time.
But after glaring at the rest of the documentation, I immediately decided that this tutorial is too difficult for me to complete, and the methods don’ t seem to be quite automated, and everytime a kernel update occurs it had to be done manually again, which I don ‘t hope to see.
So, after a full disk wipe, I started the process again.
Attempt #3
I wiped the entire disk in about 20 minutes, then format the disk in the following manner:
- Data Partition, NTFS, 11 GiB
- Boot Partition, Ext4, 128 MiB (Later changed to 256 MiB due to warnings)
- System Partition, Btrfs, 3. 7 GiB
The partitions are automatically mounted to the /tmp section by anaconda, so there is no possibility (with ease) that you can override the mount parameters before installation.
The installer actively refused the request due to the massive nature of the linux distribution. Therefore I had to enlarge the Btrfs partition to around 6 GiB in order to contain the distro and further updates.
After the installation, I rebooted the system into the flash drive (and indeed) it worked. This proved that Btrfs is bootable as a system partition.
Ere the fiddling ended, I meddled with the /etc/fstab in the targetted partition, and modified the mount arguments. Doing this employed compression on the target disk, and certainly managed to do so. We also have to do a full disk defragmentation and compress it to the smallest possible.
[root@liveuser ~]$ cd /mnt/sysimage/root
[root@liveuser root]$ btrfs filesystem defragment -rvf -czlib .
After doing this we have a small disk filled with inflated data. It also happened to boot successfully from grub2, and therefor proven that Btrfs is capable of compressing a bootable system partition.
Attempt #4
However, this attempt to shrink the filesystem to under 3 GiB had failed. Due to the exclusive nature that Btrfs requires the data on drive, uncompressed, to be not less than the partition content, it is not practical to shrink it to below the actual size of the filesystem.
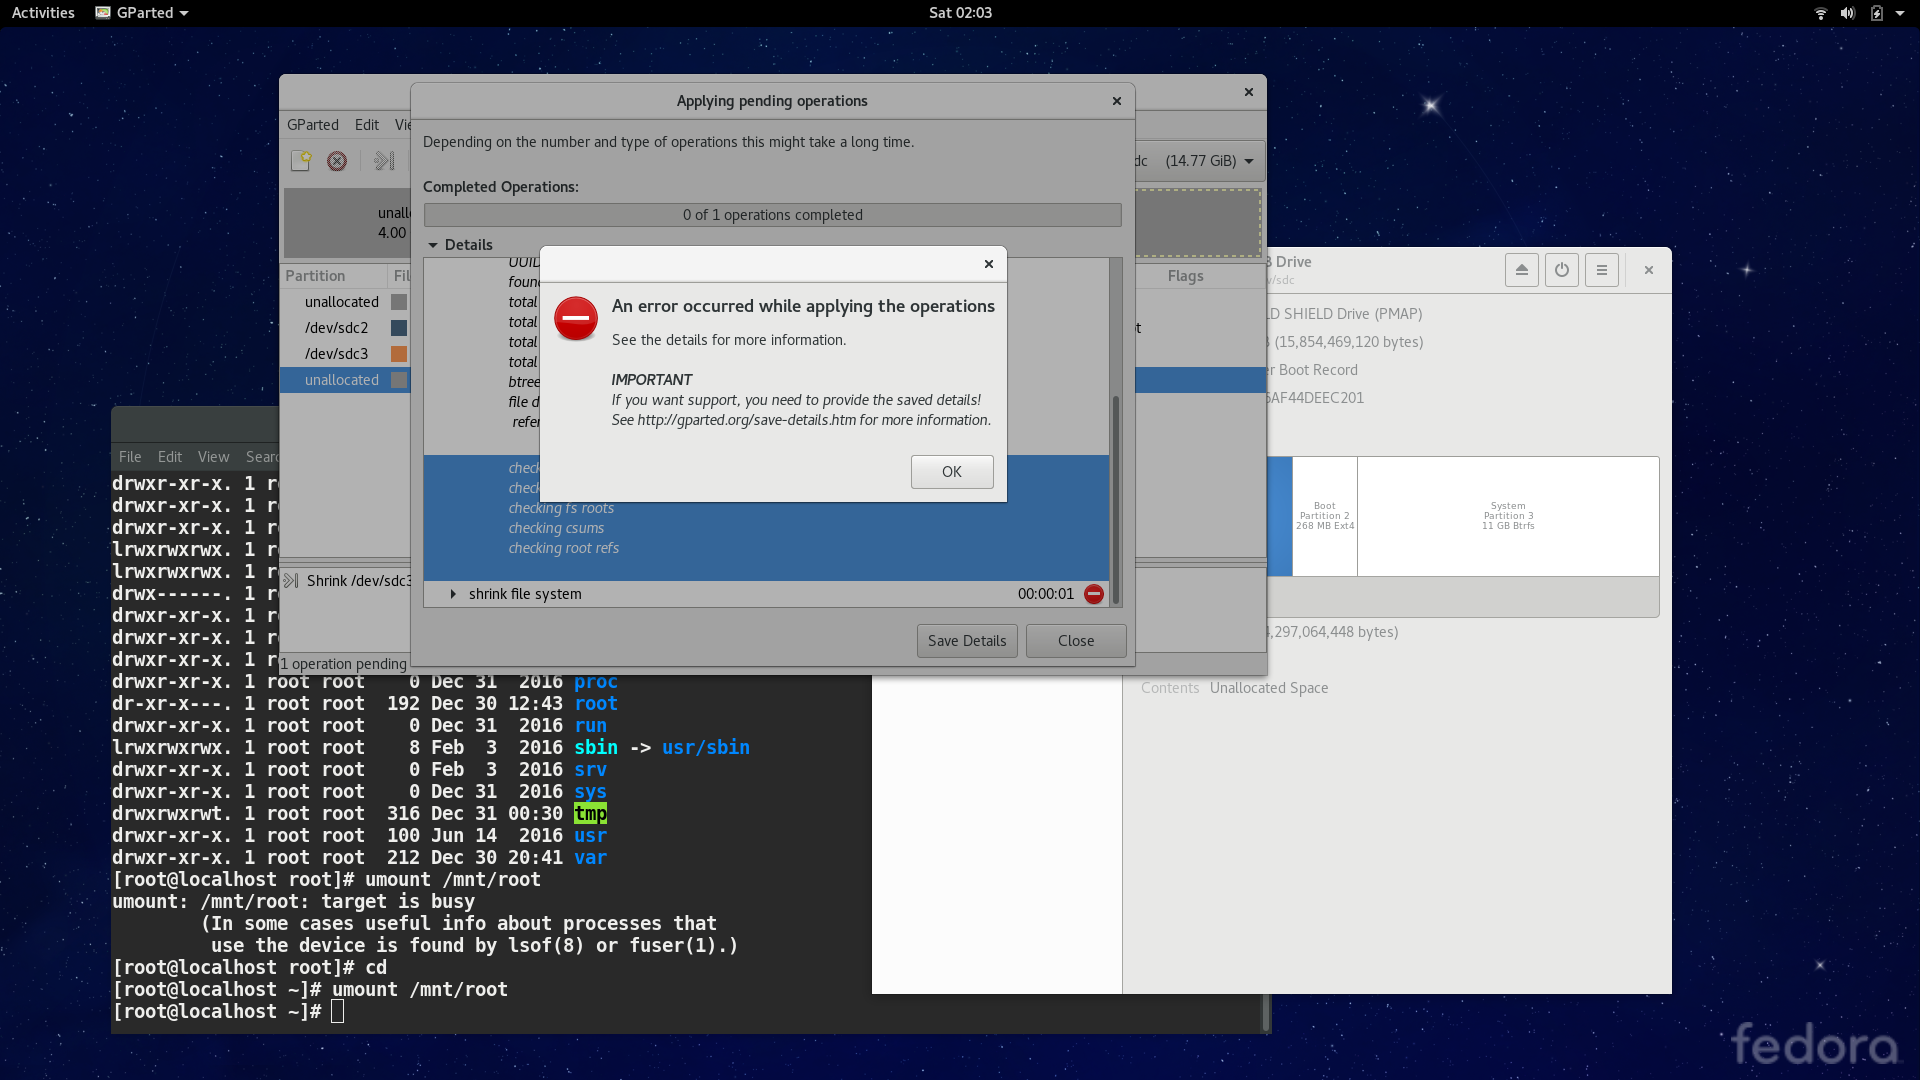
So I tried out tar and store the data, register the UUID in /etc/fstab and reboot into the flash drive. During this period it seemed that nothing wrong happened. BUT, it turned out that the user may never be able to login to the account, regardless his permissions. I believe that I have restored the files with its proper permissions and locations, using tar commands without further modifcations. Yet the operating system had failed to recognize this, and reportedly did not find the /bin/bash executable which is evidently there.
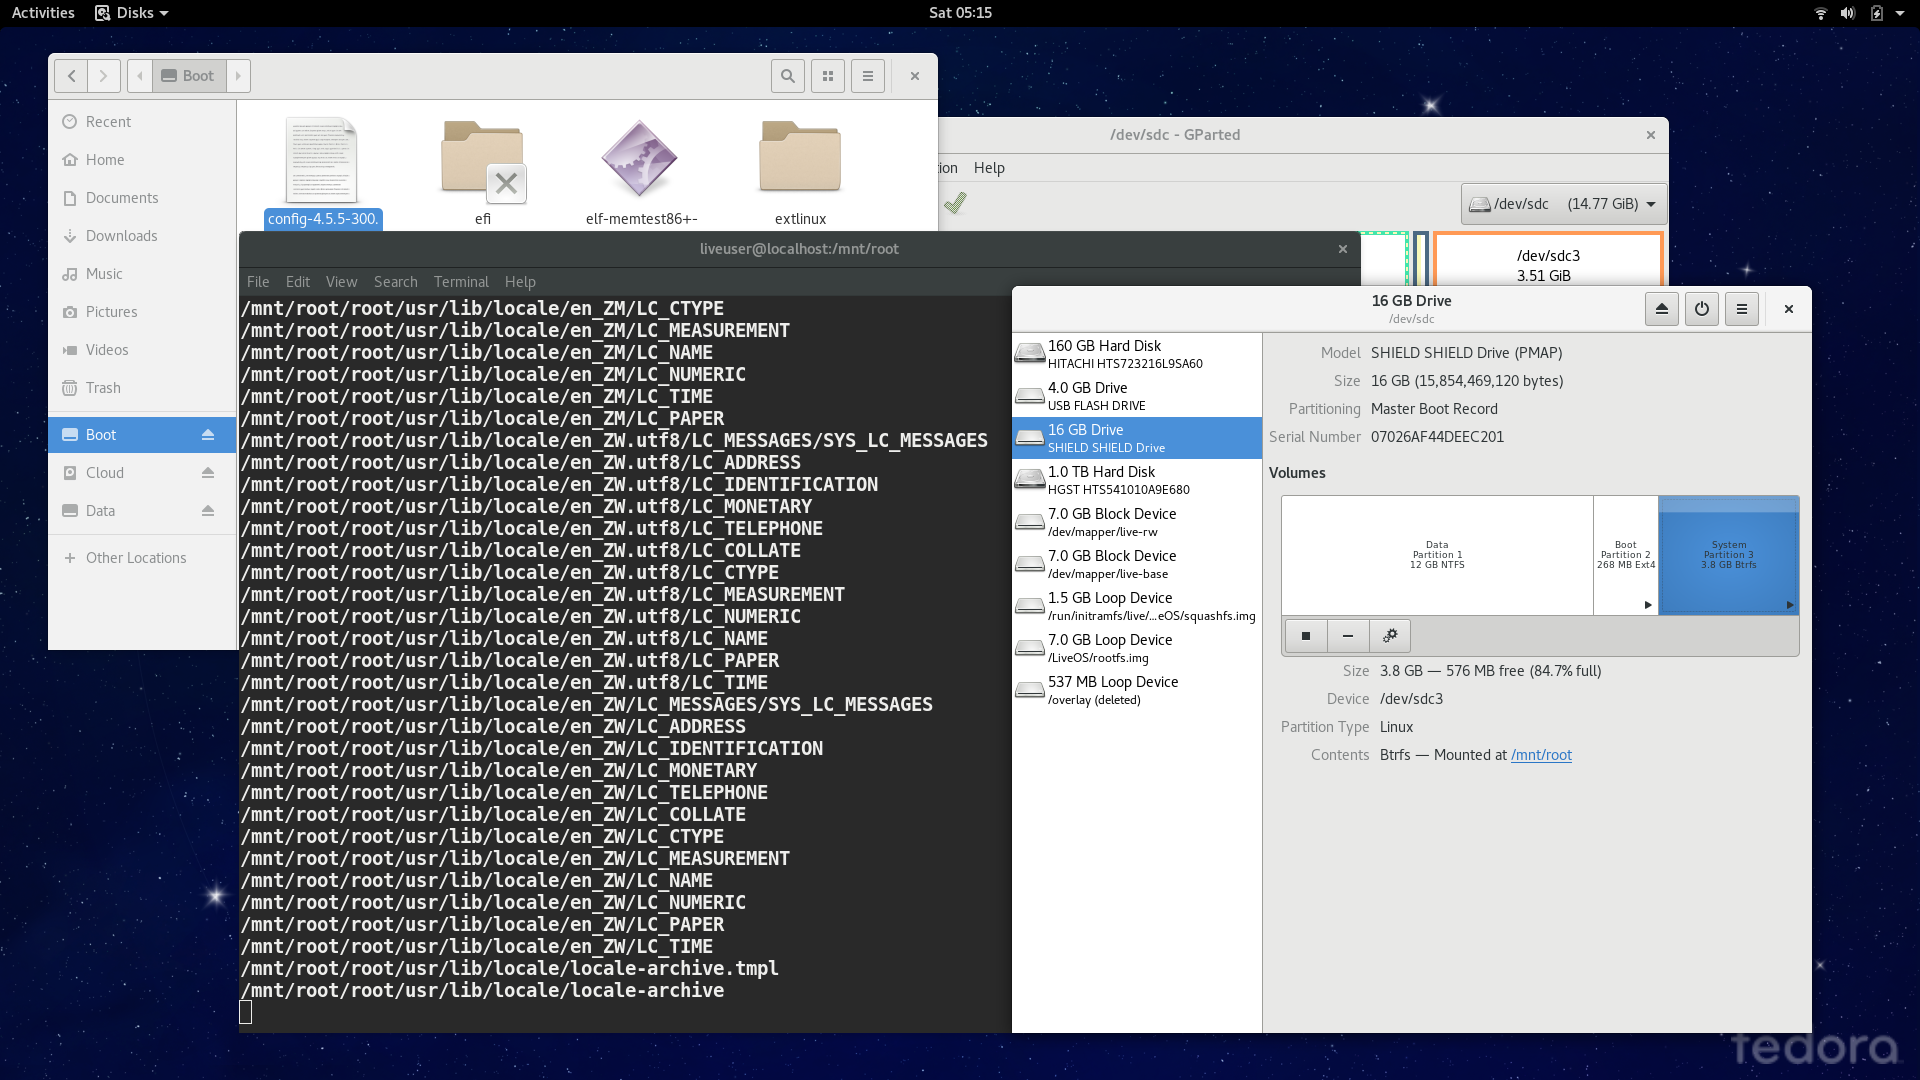
Problems shall arise. Was it caused by a small bug while modifying the content beforehand (alas, before I tar the files while in the flash drive, because I didn’ t check its consistency)? Probably not. So this method is to be abandoned.
Attempt #5
By a mistake, I actually tried to copy a gigantic file into the Btrfs partition, without warnings. The data, plus the free space in the compressed subvolume is evidently sufficient, but not when adding the raw free space that hasn ‘t been compressed. No warnings occured, and the data seemed intact.
This leads to a decision, that Btrfs can be written with as many data as it can hold while in compression mode, and will not cease to do so until it cannot compress more data than it held. In this way we can tar excessive stuff into it, without errors.
Further Attempts
The numbers labeled on those subtitles, are not exactly how many attempts I happened to run into. These are only for demonstration purposes and I did not keep a strict log.
Most further attempts succeeded without problems, which, when bilaterally implemented and accepted may, when the climate is right, lead to a mutually satisfactory resolution.
Installing Fedora
One could simply follow the predefine instructions to install Fedora. In this particular case I would cover the installation with a predifined passphrase to encrypt the system partition. Those who go against this scheme could simply left the encryption-related steps to skip this out.
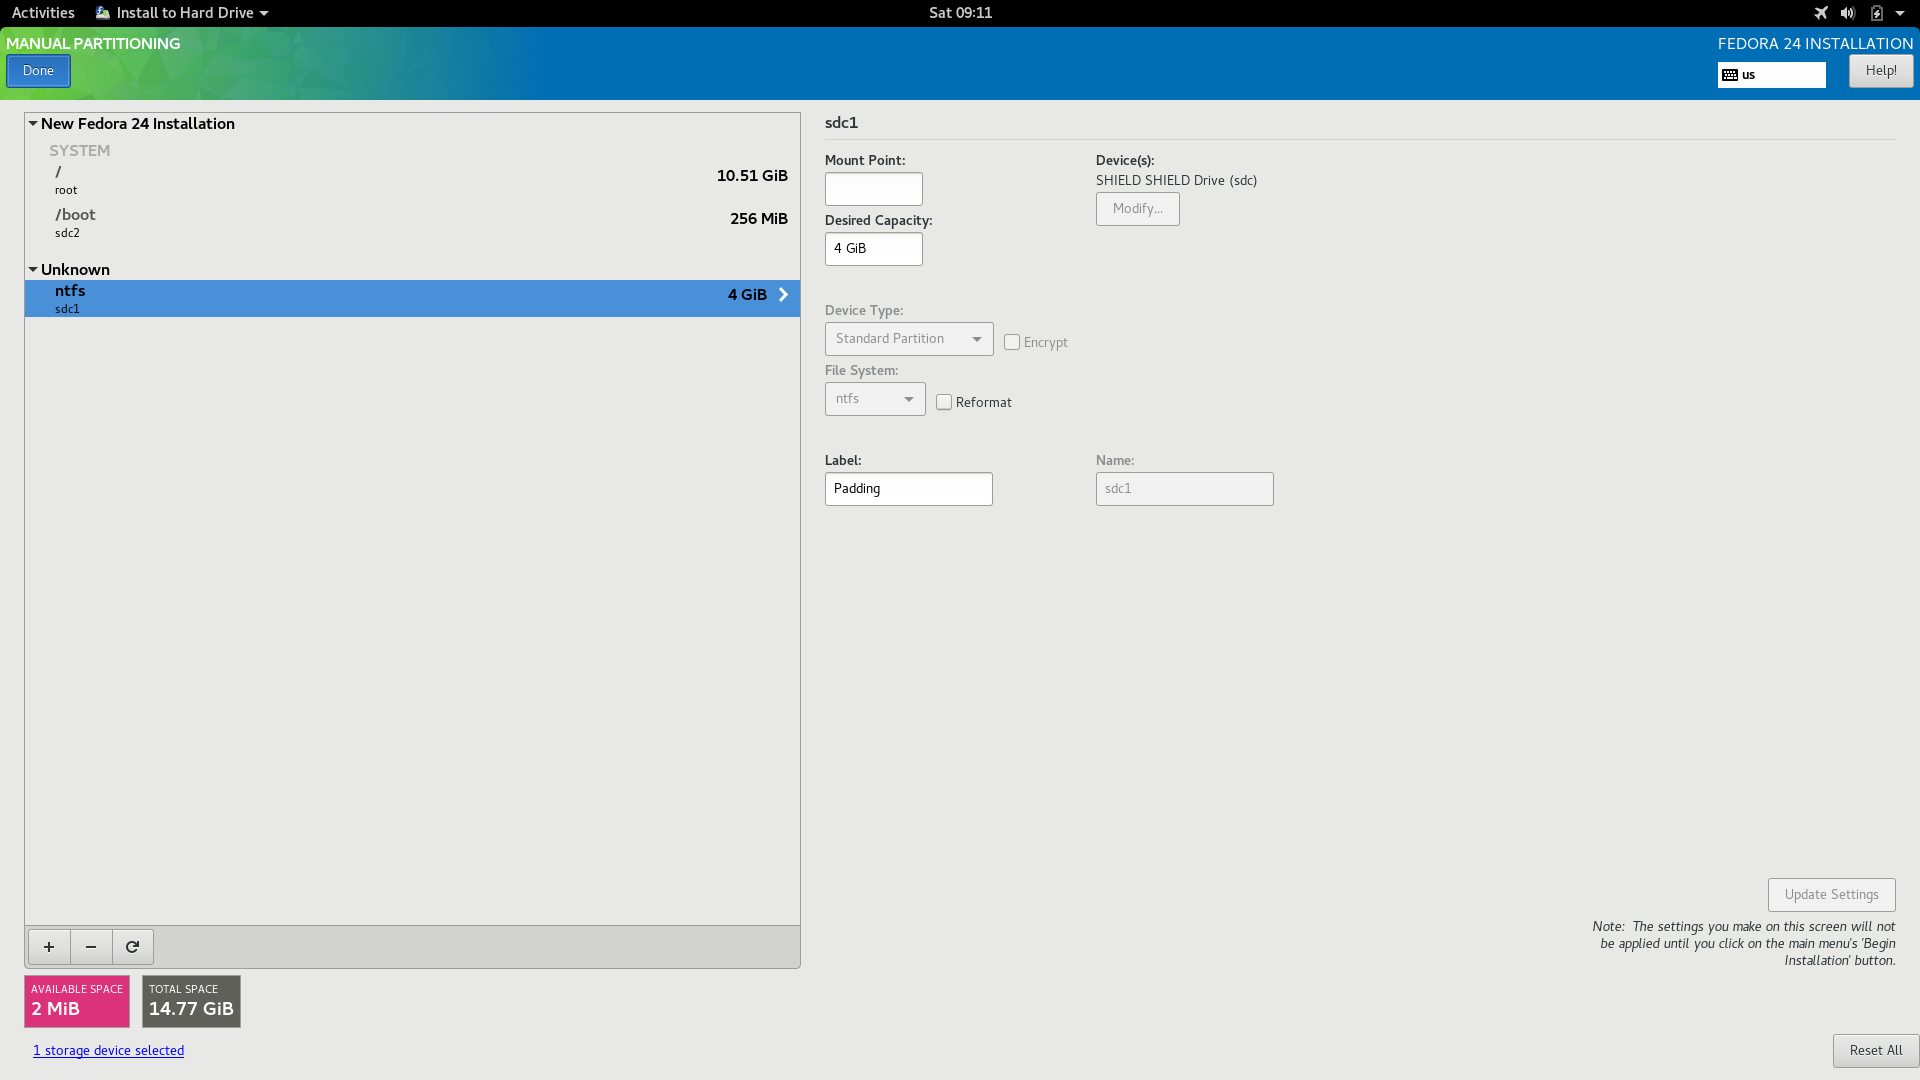
After waiting for a few minutes, the system would be ready for us to use. If you would like to prepare some premature steps before actually inflating the operating system, reboot into the flash drive and configure the operating system.
You would need to partition this drive in the following scheme:
- Boot Partition, Ext4, 256 MiB (Do not encrypt or compress)
- System Partition, Btrfs, 10 GiB (Encrypted with LUKS, Not compressed YET)
Tweak the system if you like, while checking if the installation worked.
Dumping Content
We need to preserve the content in the filesystem flawlessly and losslessly. To do this we need to invoke the built-in btrfs toolchain and send the data of the subvolume to a reliable location where we can store the data for a moment.
Note that for ease of demonstration, we will unlock the LUKS container in GNOME Disks before we enter the terminal. This could greatly reduce the keyboard burden.
Let us assume that the UUID of /dev/sdd1, alias /boot is 1be96153-0000-0000-0000-0123456789ab, UUID of the LUKS container is c69c6f93-1111-1111-1111-0123456789ab, the UUID of the Btrfs partition is 39a06cc3-2222-2222-2222-0123456789ab. The following examples and code snippets are based on this assumption.
[root@liveuser ~]$ cd /mnt
[root@liveuser mnt]$ mkdir /mnt/btrfs
[root@liveuser mnt]$ mount -t btrfs -o defaults,noatime /dev/mapper/c69c6f93-1111-1111-1111-0123456789ab /mnt/btrfs
[root@liveuser mnt]$ cd btrfs
[root@liveuser btrfs]$ ls
total 20
drwx------. 1 liveuser liveuser    8 Dec 31 11:07 .
drwxr-xr-x. 3 root     root     4096 Dec 31 11:08 ..
dr-xr-xr-x. 1 root     root      152 Dec 31 11:20 root
[root@liveuser btrfs]$
At this point we have mounted the partition, which contained a subvolume root. By the following methods we could dump the subvolume to an external location. Let us assume that the remote location is called /backup.
[root@liveuser btrfs]$ btrfs property set root ro false
[root@liveuser btrfs]$ cd root
[root@liveuser root]$ ls
total 32
dr-xr-xr-x. 1 root     root      152 Dec 31 11:20 .
drwx------. 1 root     root       28 Dec 31 11:07 ..
lrwxrwxrwx. 1 root     root        7 Feb  3  2016 bin -> usr/bin
drwxr-xr-x. 1 root     root       30 Dec 31 08:40 boot
drwxr-xr-x. 1 root     root        0 Dec 31 08:40 dev
drwxr-xr-x. 1 root     root    73412 Dec 31 08:59 etc
drwxr-xr-x. 1 root     root       14 Dec 31 08:53 home
lrwxrwxrwx. 1 root     root        7 Feb  3  2016 lib -> usr/lib
lrwxrwxrwx. 1 root     root        9 Feb  3  2016 lib64 -> usr/lib64
drwx------. 1 root     root        0 Jun 14  2016 lost+found
drwxr-xr-x. 1 root     root        7 Feb  3  2016 media
drwxr-xr-x. 1 root     root        0 Feb  3  2016 mnt
drwxr-xr-x. 1 root     root        0 Feb  3  2016 opt
drwxr-xr-x. 1 root     root        0 Dec 31 08:40 proc
dr-xr-x---. 1 root     root      167 Dec 31 08:59 root
drwxr-xr-x. 1 root     root        0 Dec 31 08:40 run
lrwxrwxrwx. 1 root     root        8 Feb  3  2016 sbin -> usr/sbin
drwxr-xr-x. 1 root     root        0 Feb  3  2016 srv
drwxr-xr-x. 1 root     root        0 Dec 31 08:40 sys
drwxrwxrwt. 1 root     root      325 Dec 31 08:54 tmp
drwxr-xr-x. 1 root     root      177 Jun 14  2016 usr
drwxr-xr-x. 1 root     root     1367 Dec 31 03:55 var
# Note that the data in the results are meddled with. So don't try to find anything
# Seemingly useful from it.
[root@liveuser root]$
Currently this subvolume @root is read-only. I must clarify that the function btrfs property is not documented in the documentation until very recently, which until now is still unavailable through man btrfs. Albeit though, you can still access the manpage for it through man btrfs-property.
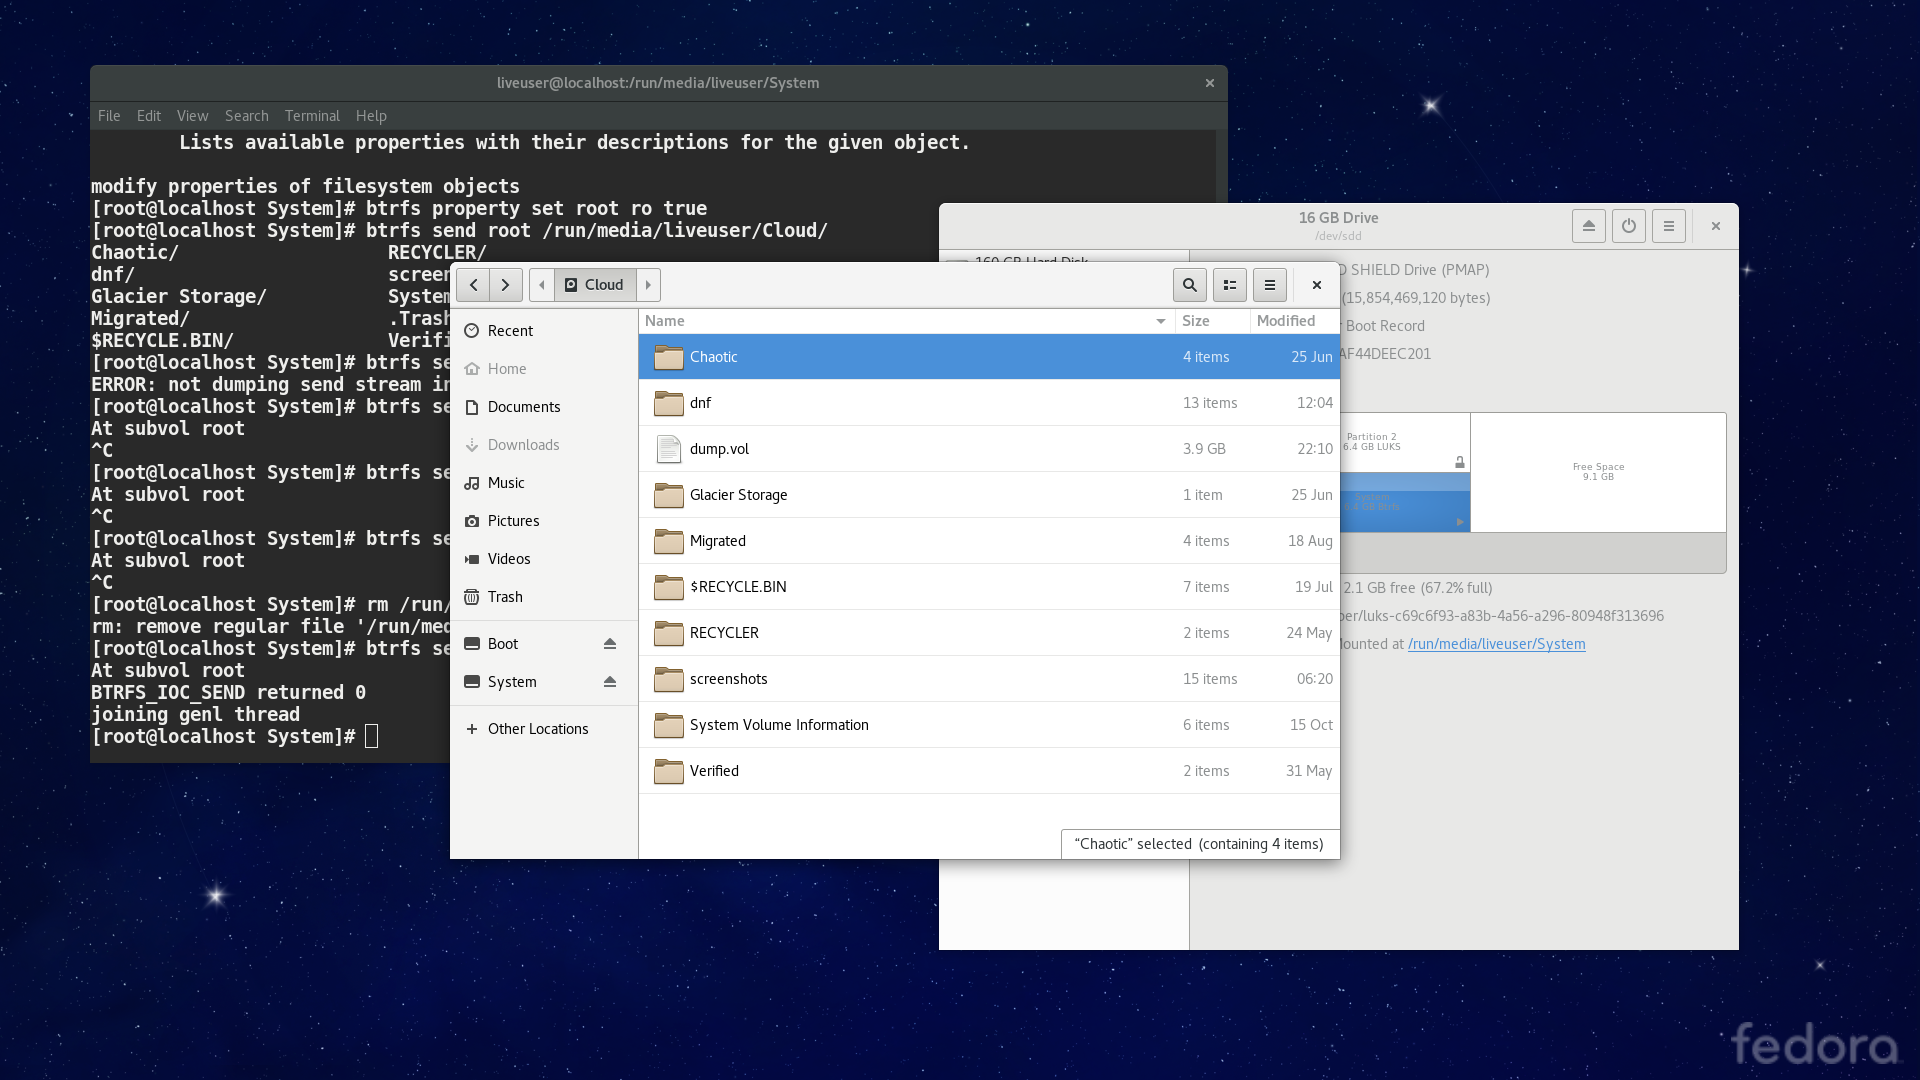
Now we are about to extract it from the partition.
[root@liveuser root]$ cd ..
[root@liveuser btrfs]$ btrfs send -v /mnt/btrfs/root > /backup/dump.vol
At subvol root
BTRFS_IOC_SEND returned 0
joining genl thread
[root@liveuser btrfs]$
Still, we had to retrieve the UUIDs of the partitions, so that we may restored them at a later point.
Because I personally do not welcome such partition tables like /dev/sdd4 comes before /dev/sdd1, I would certainly rename the /boot partition to /dev/sdd2, as a reservation for the data partition, which is to be accessible (and the only one accessible) in Windows. The following commands retrieves the UUID from the /boot partition:
[root@liveuser dev]# dumpe2fs /dev/sdd2
dumpe2fs 1.42.13 (17-May-2015)
Filesystem volume name:   Boot
Last mounted on:          /run/media/liveuser/Boot
Filesystem UUID:          1be96153-0000-0000-0000-0123456789ab
Filesystem magic number:  0xEF53
Filesystem revision #:    1 (dynamic)
Filesystem features:      has_journal ext_attr resize_inode dir_index filetype extent flex_bg sparse_super large_file huge_file uninit_bg dir_nlink extra_isize
Filesystem flags:         signed_directory_hash
Default mount options:    user_xattr acl
Filesystem state:         clean
Errors behavior:          Continue
Filesystem OS type:       Linux
Inode count:              65536
Block count:              262144
Reserved block count:     13107
Free blocks:              132408
Free inodes:              65106
First block:              1
Block size:               1024
Fragment size:            1024
Reserved GDT blocks:      256
Blocks per group:         8192
Fragments per group:      8192
Inodes per group:         2048
Inode blocks per group:   256
Flex block group size:    16
......
While the UUID of the Btrfs partition, can (as far as I am concerned) only be read by gparted, as a subsidiary function.
Since the LUKS UUID can be read from /dev/mapper/*, we may not need to care about it at the moment.
Note that you need to be specifically careful about this. The UUID must be taken down carefully, in order to avoid more sophistication modifying different grub and Linux configurations.
Restoring Content
Now this comes to the harder part. We need to recreate a lot of stuff, then we can restore the content. We need to restore the UUID and the subvolumes et cetera, but it’ s still not half as sophisticated as doing it by bare hand.
We need to relocate the /boot partition from /dev/sdd1 to /dev/sdd2, and remove /dev/sdd2 on the way (That is to remove the Btrfs+LUKS partiton). This may require fdisk, since parted would forcefully convert the MBR partition table to GPT partition table anyway, which we do not like to happen, since this flash drive is faced towards a wider range of computers.
Deleting /dev/sdd2 can be done in gparted.
[root@liveuser mnt]$ fdisk /dev/sdd

Welcome to fdisk (util-linux 2.28).
Changes will remain in memory only, until_ you decide to write them.
Be careful before using the write command.


Command (m for help): p
Disk /dev/sdd: 14.8 GiB, 15854469120 bytes, 30965760 sectors
Units: sectors of 1 * 512 = 512 bytes
Sector size (logical/physical): 512 bytes / 512 bytes
I/O size (minimum/optimal): 512 bytes / 512 bytes
Disklabel type: dos
Disk identifier: 0x3456789a

Device     Boot    Start      End Sectors  Size Id Type
/dev/sdd1  *    30441472 30965759  524288  256M 83 Linux

Command (m for help): d
Selected partition 1
Partition 1 has been deleted.

Command (m for help): n
Partition type
   p   primary (0 primary, 0 extended, 4 free)
   e   extended (container for logical partitions)
Select (default p): p
Partition number (1-4, default 1): 2
First sector (2048-30965759, default 2048): 30441472
Last sector, +sectors or +size{K,M,G,T,P} (30441472-30965759, default 30965759): 30965759

Created a new partition 2 of type Linux and of size 256 MiB.

Command (m for help): a
Selected partition 2
The bootable flag on partition 2 is enabled now.

Command (m for help): p
Disk /dev/sdd: 14.8 GiB, 15854469120 bytes, 30965760 sectors
Units: sectors of 1 * 512 = 512 bytes
Sector size (logical/physical): 512 bytes / 512 bytes
I/O size (minimum/optimal): 512 bytes / 512 bytes
Disklabel type: dos
Disk identifier: 0x92663fa3

Device     Boot    Start      End Sectors  Size Id Type
/dev/sdd2  *    30441472 30965759  524288  256M 83 Linux

Command (m for help): w
The partition table has been altered.
Calling ioctl() to re-read partition table.
Syncing disks.

[root@liveuser mnt]$
We may now use GNOME Disks to recreate another LUKS Partition, But this time with an Ext4 partition at first. Should we set the passphrase to some known values, we may remove the Ext4 partition, then create a Btrfs partition inside the LUKS container, which is allowed in GNOME Disks but not in gparted.
Now we modify the LUKS container ‘s UUID, after unmounting all subsidiaries of it to prevent data corruption.
[root@liveuser mnt]$ cryptsetup luksUUID --uuid c69c6f93-1111-1111-1111-0123456789ab /dev/sdd3

WARNING!
========
Do you really want to change UUID of device?

Are you sure? (Type uppercase yes): YES
[root@liveuser dev]$ cryptsetup luksUUID /dev/sdd3
c69c6f93-1111-1111-1111-0123456789ab
So now we receive the dump of the subvolume to the Btrfs partition. We assume that it is mounted on /mnt/btrfs, with compression zlib.
[root@liveuser mnt]$ mount -t btrfs -o noatime,compress=zlib /dev/mapper/luks-c69c6f93-1111-1111-1111-0123456789ab /mnt/btrfs
[root@liveuser mnt]$ cd /mnt/btrfs
[root@liveuser btrfs]$ btrfs receive -vf /backup/dump.vol /mnt/btrfs
At subvol root
receiving subvol root uuid=303dc832-1234-5678-9abc-123456789abc, stransid=62
BTRFS_IOC_SET_RECEIVED_SUBVOL uuid=303dc832-1234-5678-9abc-123456789abc, stransid=62
[root@liveuser btrfs]$
The UUID of a Btrfs partition is hard-coded on every block of the partition. So compared to LUKS and Ext4, it’ s a bit harder to change its UUID. It ‘s a bit harder, but not impossible. Only to mention that you should not remove your dump YET, since this action might be potentially dangerous.
[root@liveuser mnt]$ btrfs check /dev/mapper/luks-c69c6f93-1111-1111-1111-0123456789ab
Checking filesystem on /dev/mapper/luks-c69c6f93-1111-1111-1111-0123456789ab
UUID: 2a5df1d8-6666-6666-6666-0123456789ab
checking extents
checking free space cache
checking fs roots
checking csums
checking root refs
found 2419159047 bytes used err is 0
total csum bytes: 2000000
total tree bytes: 180000000
total fs tree bytes: 160000000
total extent tree bytes: 10300000
btree space waste bytes: 23000000
file data blocks allocated: 2200000000
 referenced 3800000000
[root@liveuser mnt]$
After checking the partition for problems, we mount the partition, and modify the UUID with a small trick. The partition must be offline before you make these modifications.
[root@liveuser mnt]$ btrfstune -U 39a06cc3-2222-2222-2222-0123456789ab /dev/mapper/luks-c69c6f93-1111-1111-1111-0123456789ab
Warning: It is highly recommended to run 'btrfs check' before this operation
Also canceling running UUID change progress may cause corruption
We are going to change UUID, are your sure? [y/N]: y
Current fsid: 2a5df1d8-6666-6666-6666-0123456789ab
New fsid: 39a06cc3-2222-2222-2222-0123456789ab
Set superblock flag CHANGING_FSID
Change fsid in extents
Change fsid on devices
Clear superblock flag CHANGING_FSID
Fsid change finished
[root@liveuser mnt]$ btrfs property set /mnt/btrfs/root ro false
If you are not confident, re-run a filesystem check. This won’ t take too long.
Managing to Boot
Some may discover that their grub2 may fail to load their systems after a reboot into the target. This is evidently true, as one occured oneself. The only thing that you need to do is re-install grub, like this:
[root@liveuser mnt]$ grub2-install --boot-directory /mnt/newboot /dev/sdd
Installing for i386-pc platform.
Installation finished. No error reported.
[root@liveuser mnt]$
Where /mnt/newboot detonates the location of /dev/sdd2, i. e. the boot partition on your flash drive.
This should work fine, and when you boot up from the flash drive you may see a password dialog, when entered you are inside the operating system.
Small Tweaks
You may want to add RpmFusion sources to the flash drive.
- Free Software:https://download1.rpmfusion.org/free/fedora/rpmfusion-free-release-24.noarch.rpm
- Non-Free Software:https://download1.rpmfusion.org/nonfree/fedora/rpmfusion-nonfree-release-24.noarch.rpm
Then you can add your favourite applications to your portable environment.
You may also consider removing some useless programs, but this depends on personal opinions. I would not make a suggestion here.
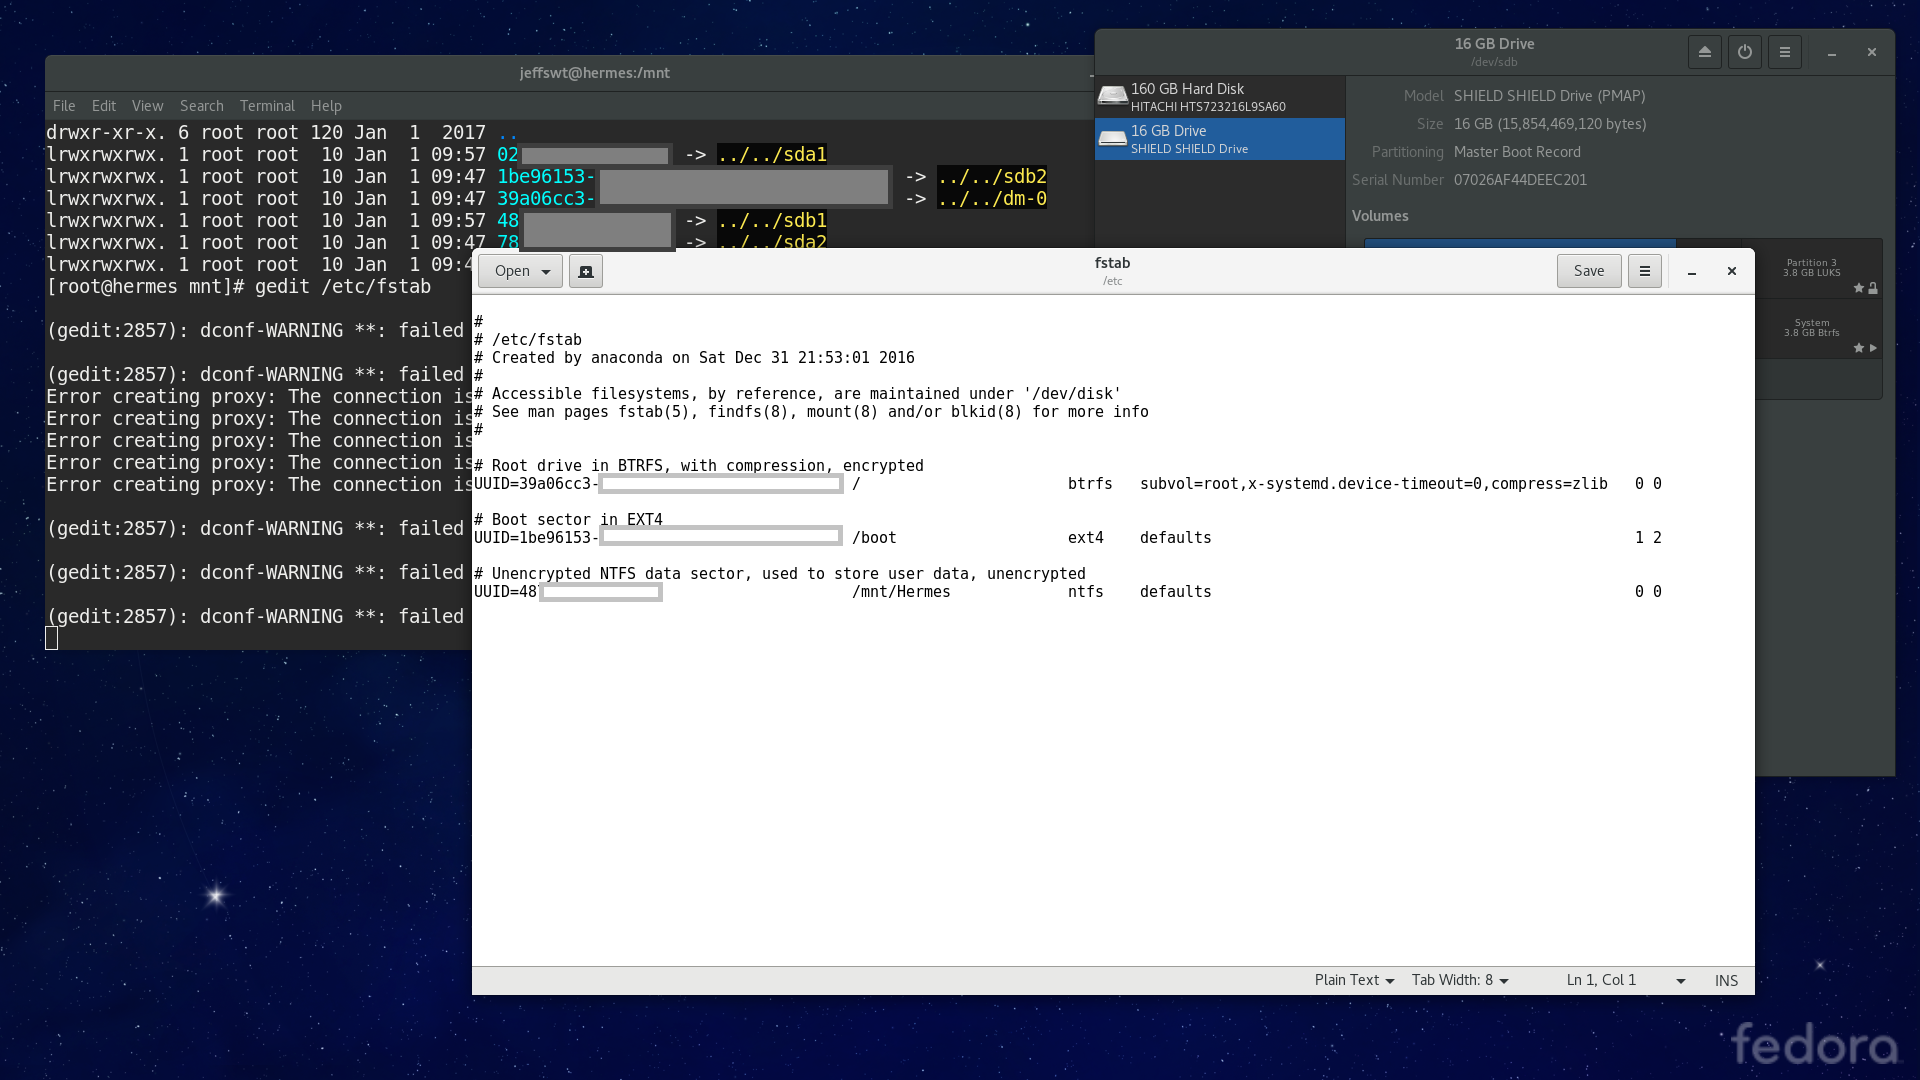
Creating a few symbolic links from your data partition (/dev/sdd1) to your home folder may also be a good choice. This could prevent routinely files from consuming all your /dev/sdd3 space.
You can disable the password requirements upon bootup, since you had already entered the key to unlocking the drive upon kernel load.
Installing Portable Apps
Compared to the Linux Part, this is way easier.
I simply made the partition inflatable (By setting a flag to TRUE), and the space consumption immediately reduced to a small value. But we had to backup the content of this portable environment as a whole and deflate it, so we need to reduce the partition size at first, then wipe the empty area, and inflate it again.
These are a few screenshots I have taken midway:
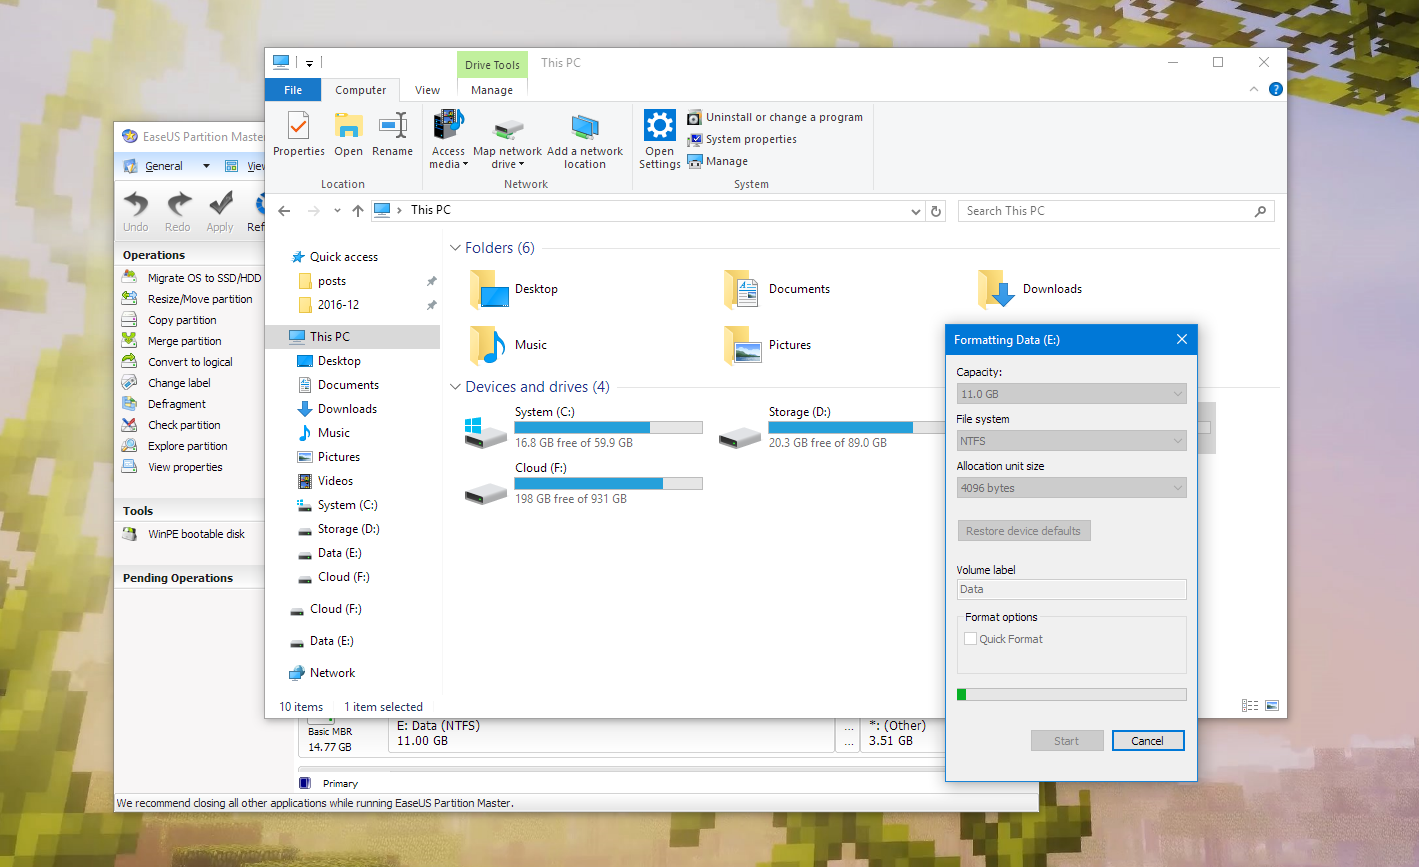
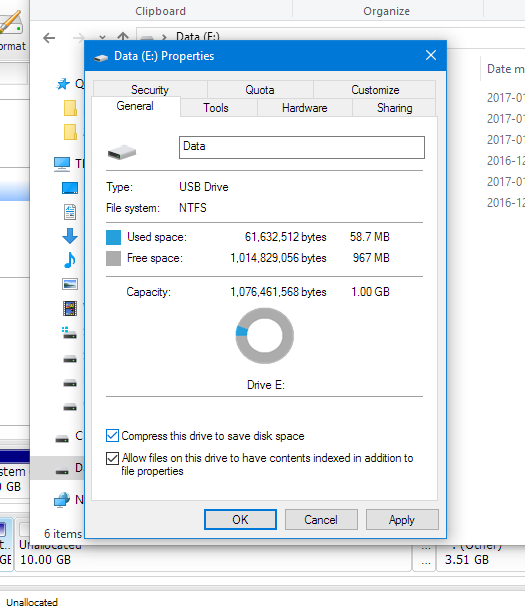
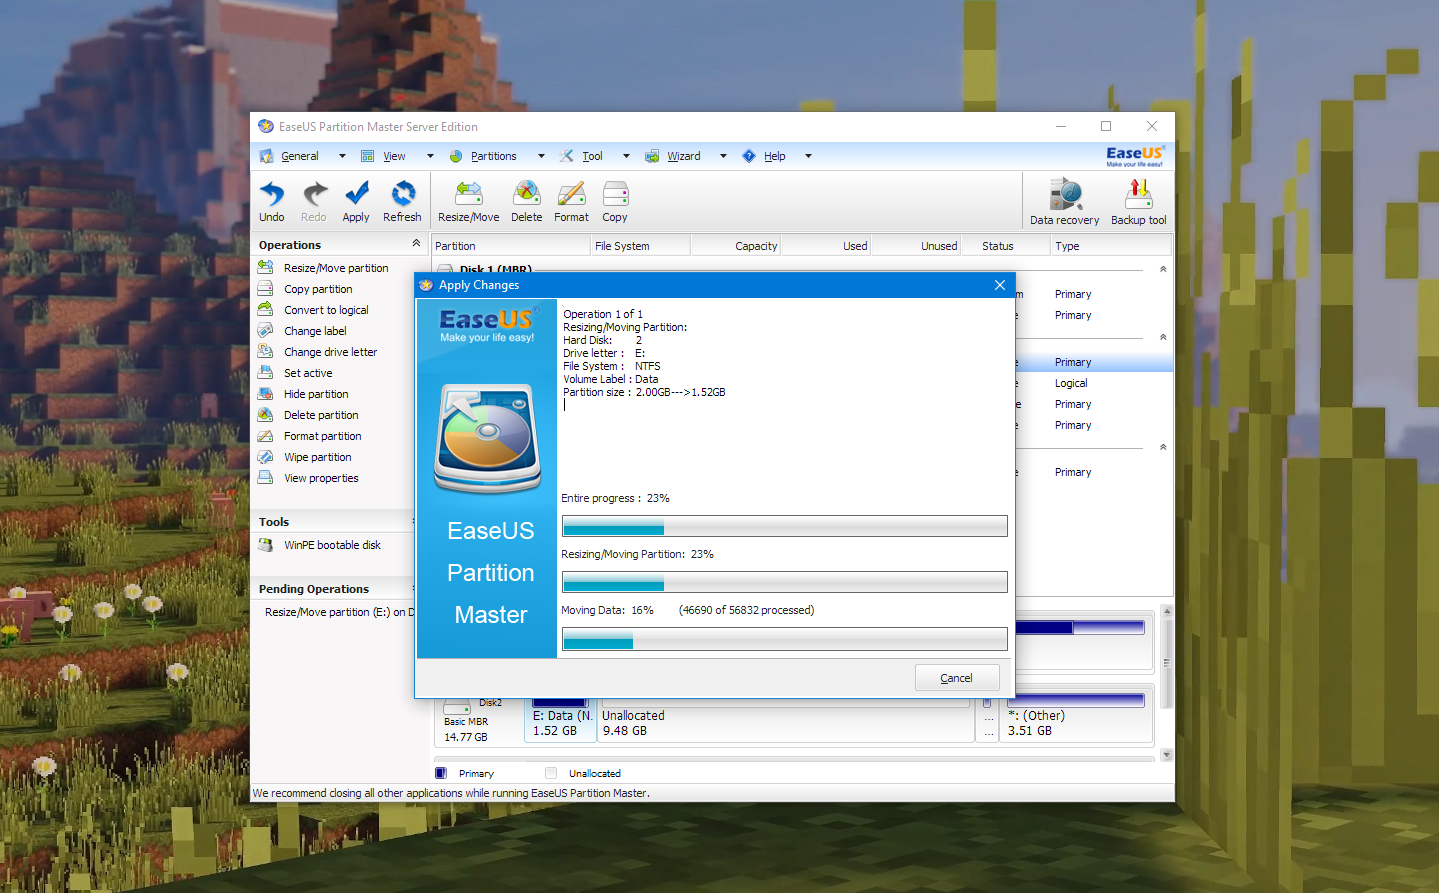
Note that after modifying a volume it should be better to check if the UUID had changed. If it had, modify it in /etc/fstab, should you automount the partition upon startup.
I also created a few splashes for the Portable Applications, as a replacement. They can be accessed here:Archived splashes, with project files
Final Touches
Edit the modified time and created time on NTFS to 2017-01-01 08: 00: 00, then it ‘s all done.
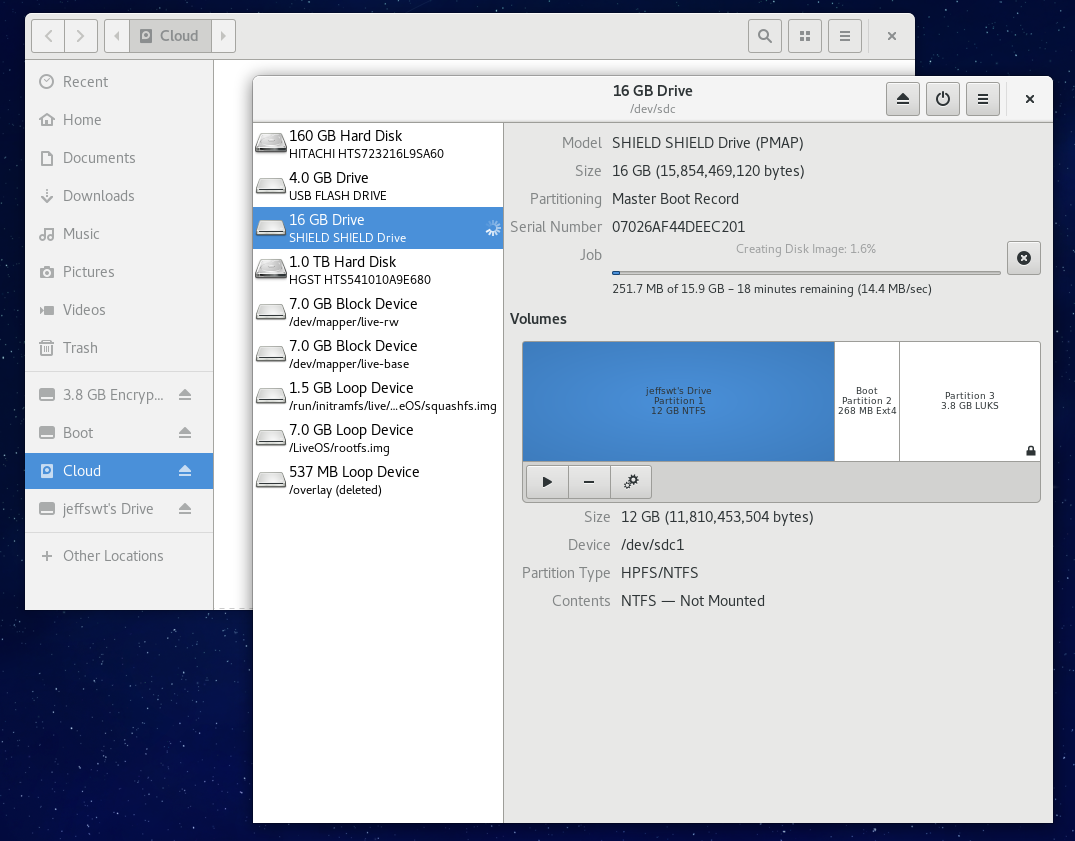
Dump the image of the flash drive to a .img file and deflate it, so that we can deploy it later in a blink. Note that if you enabled encryption, you will receive poor results while deflating /dev/sdd3.
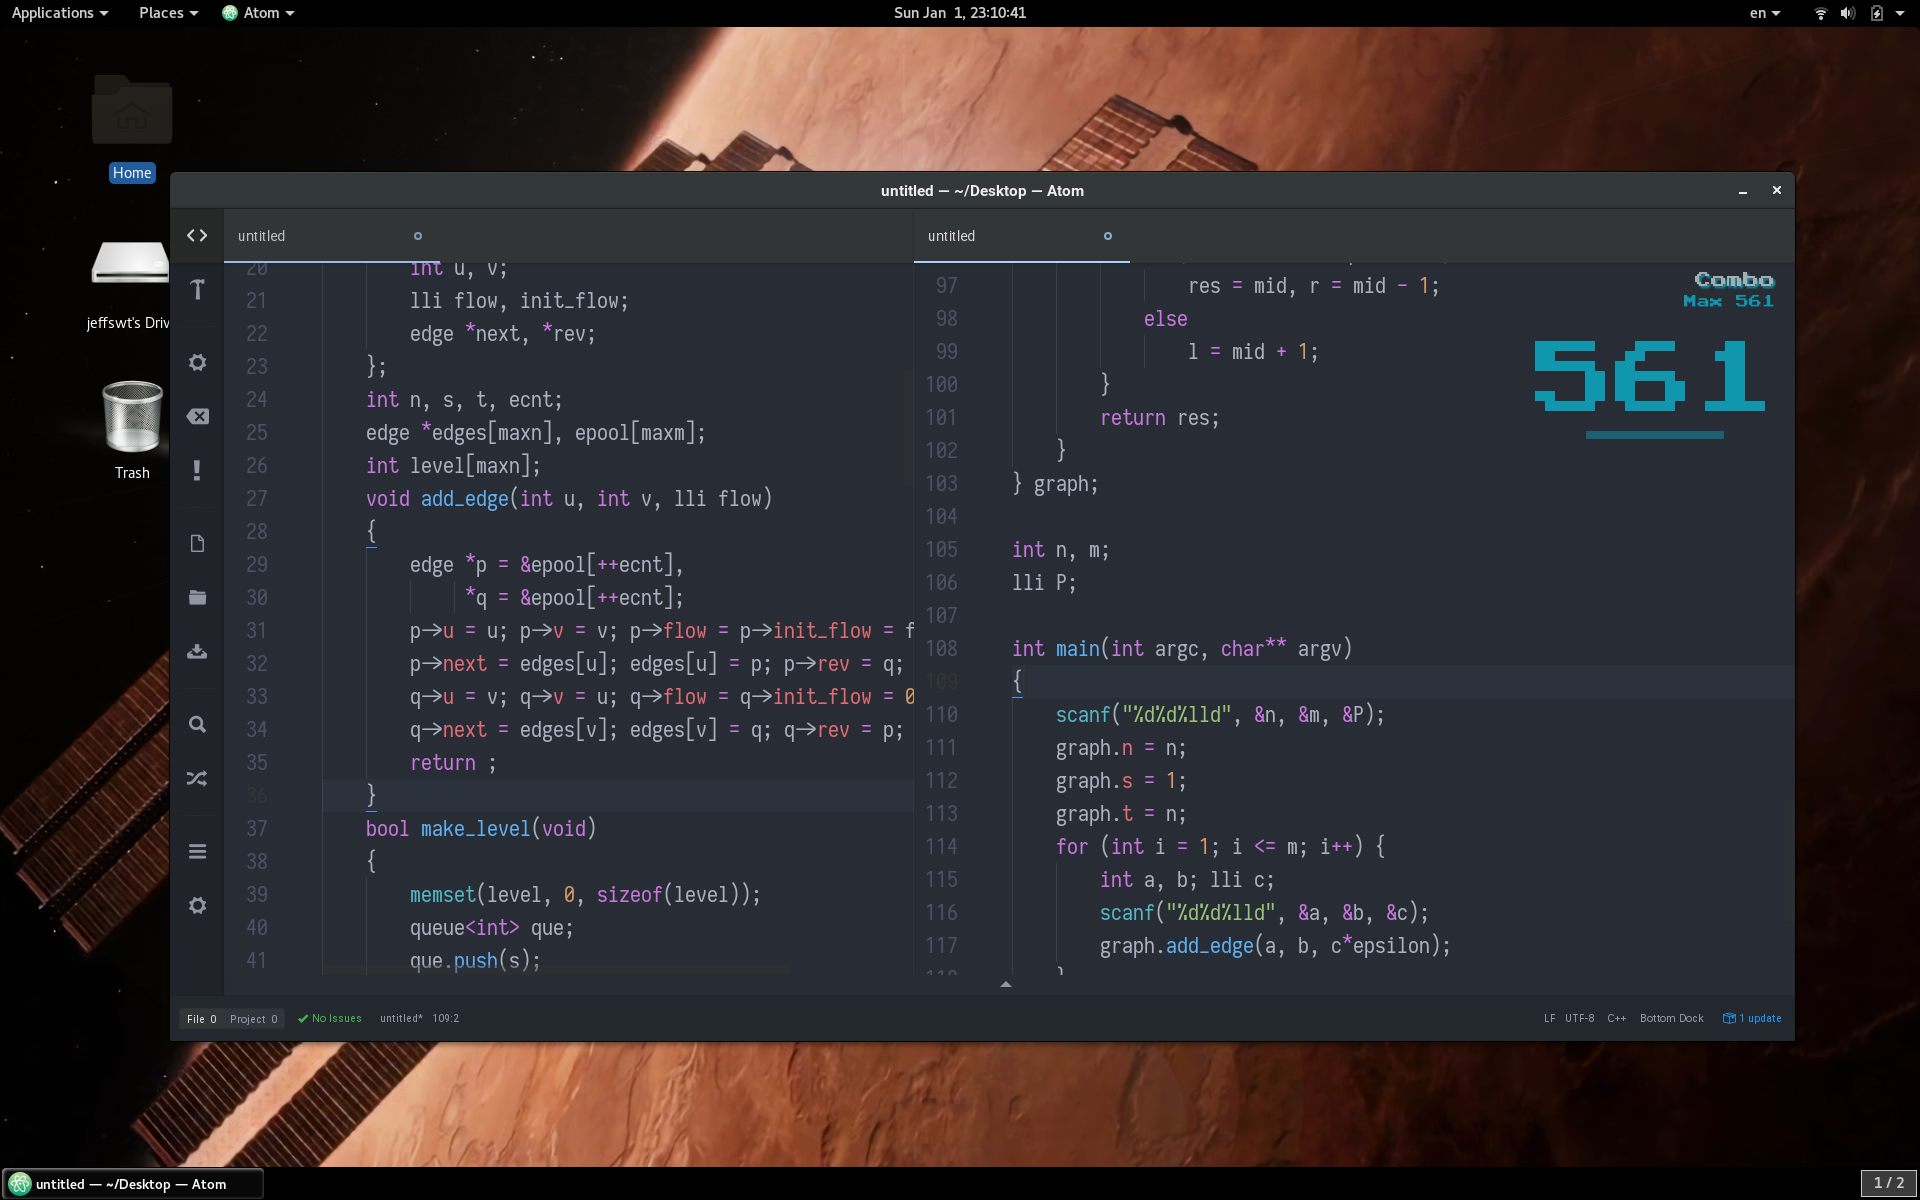
Final Effect
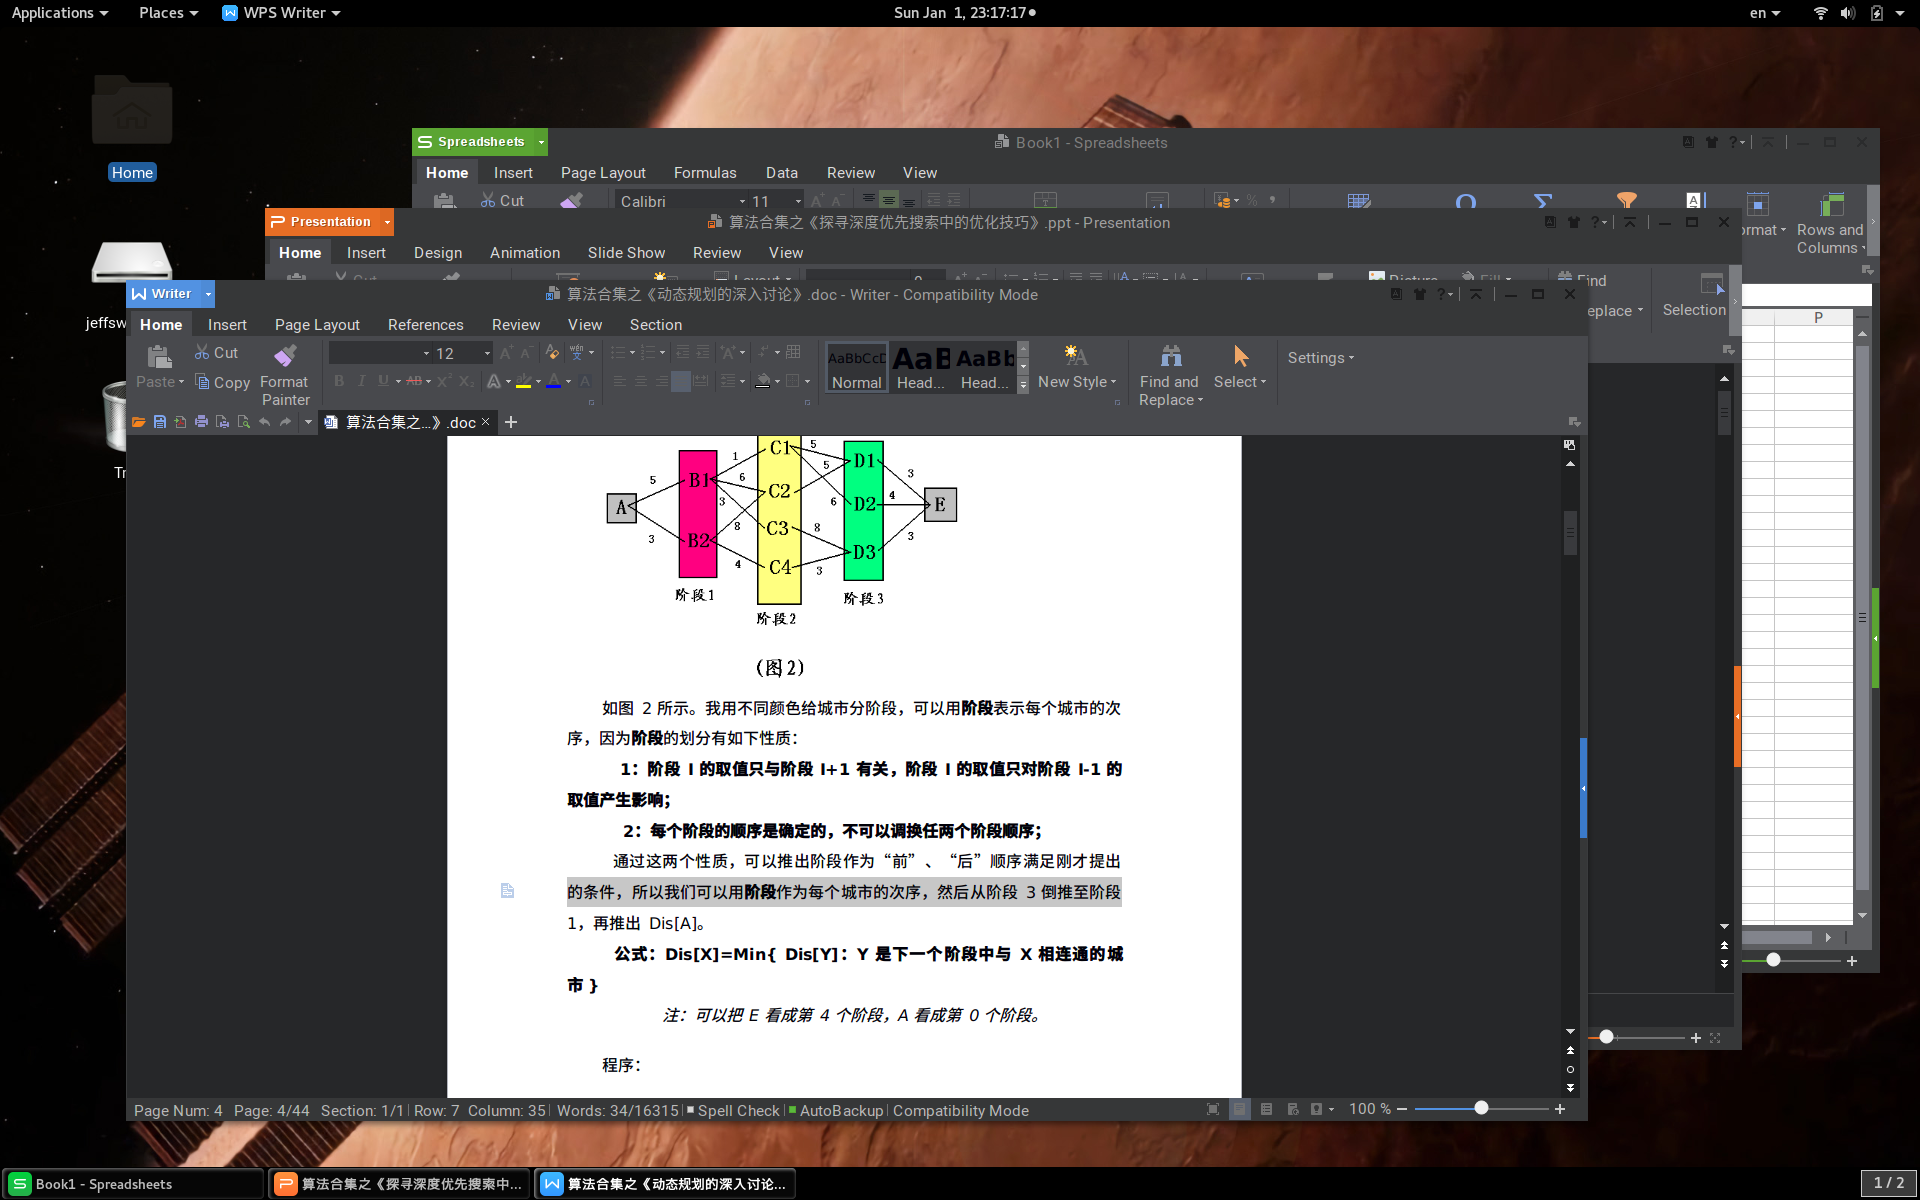
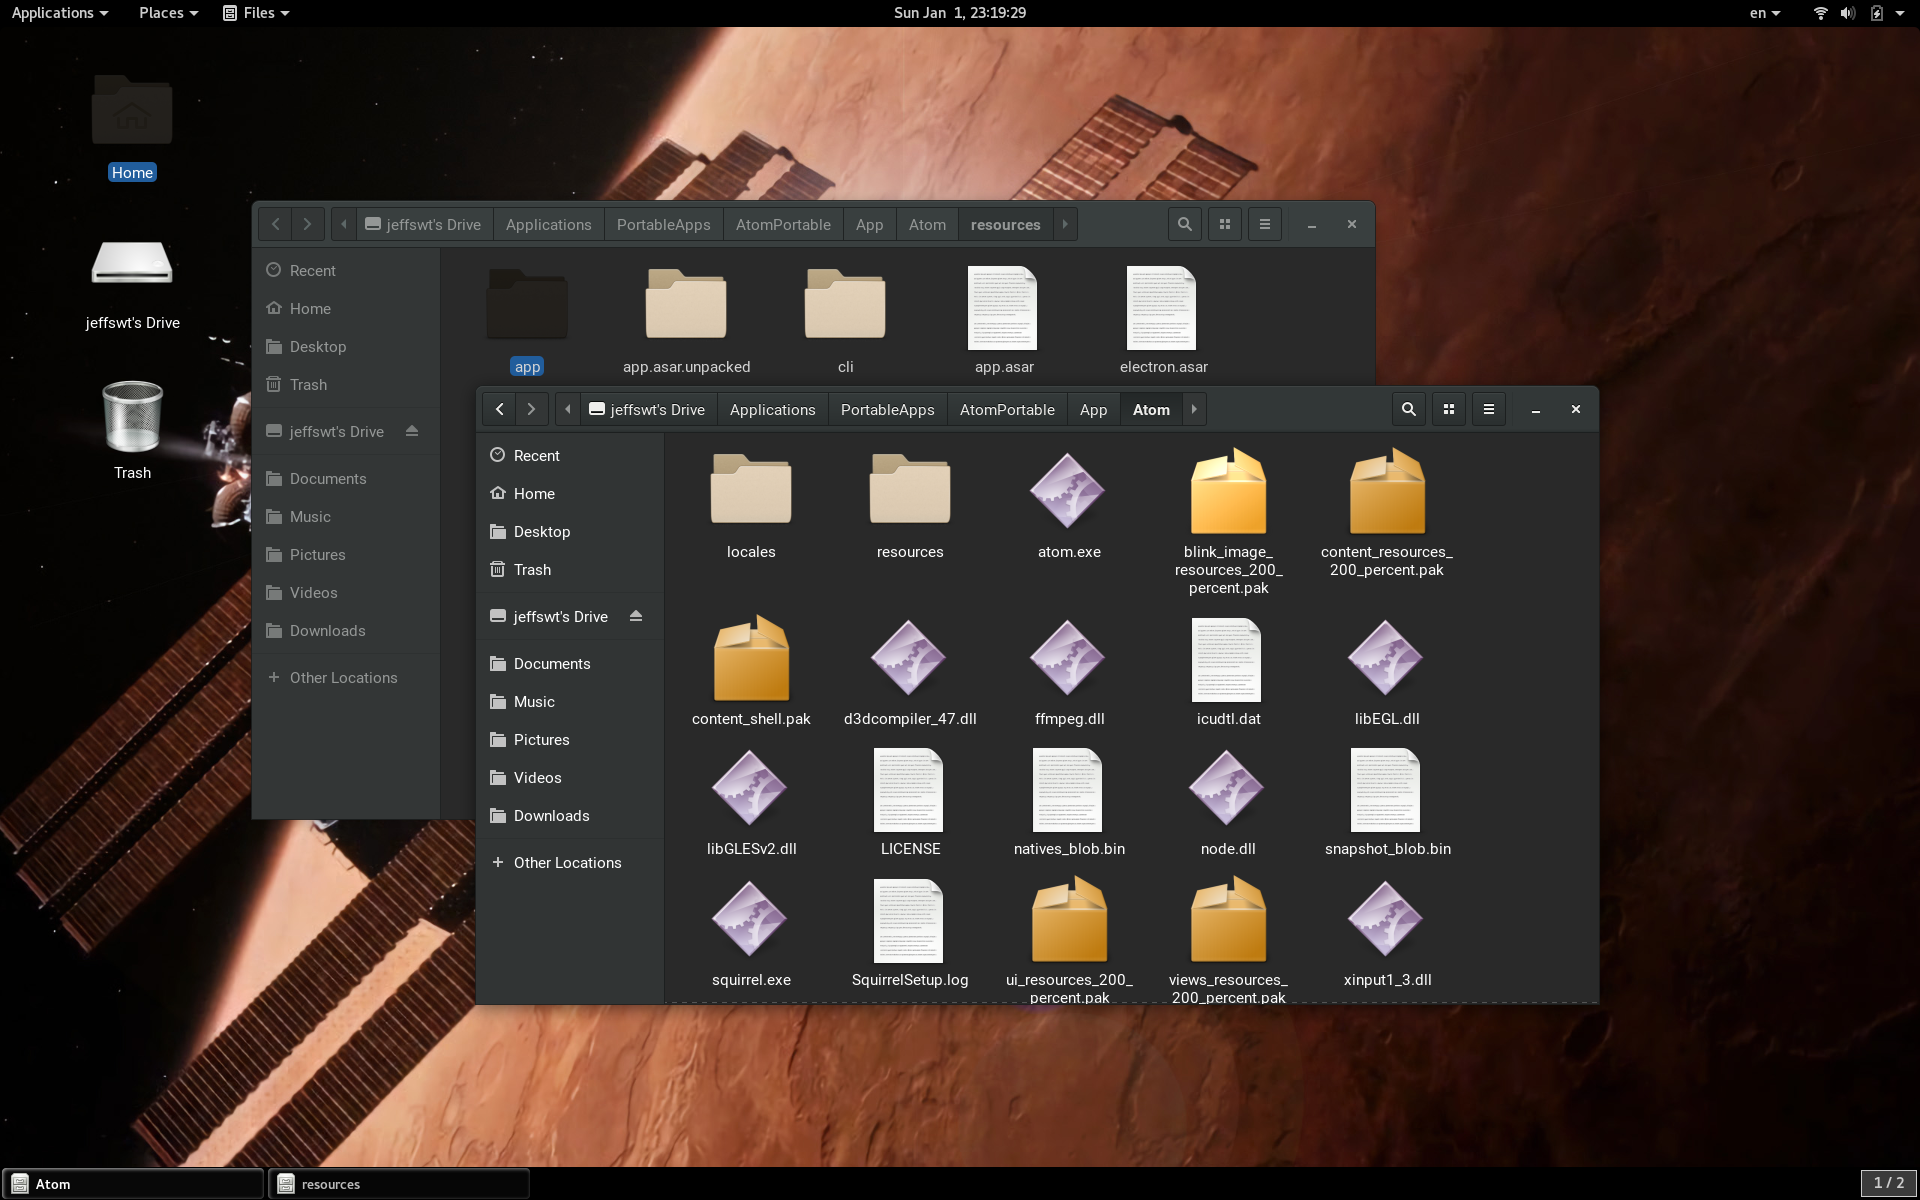
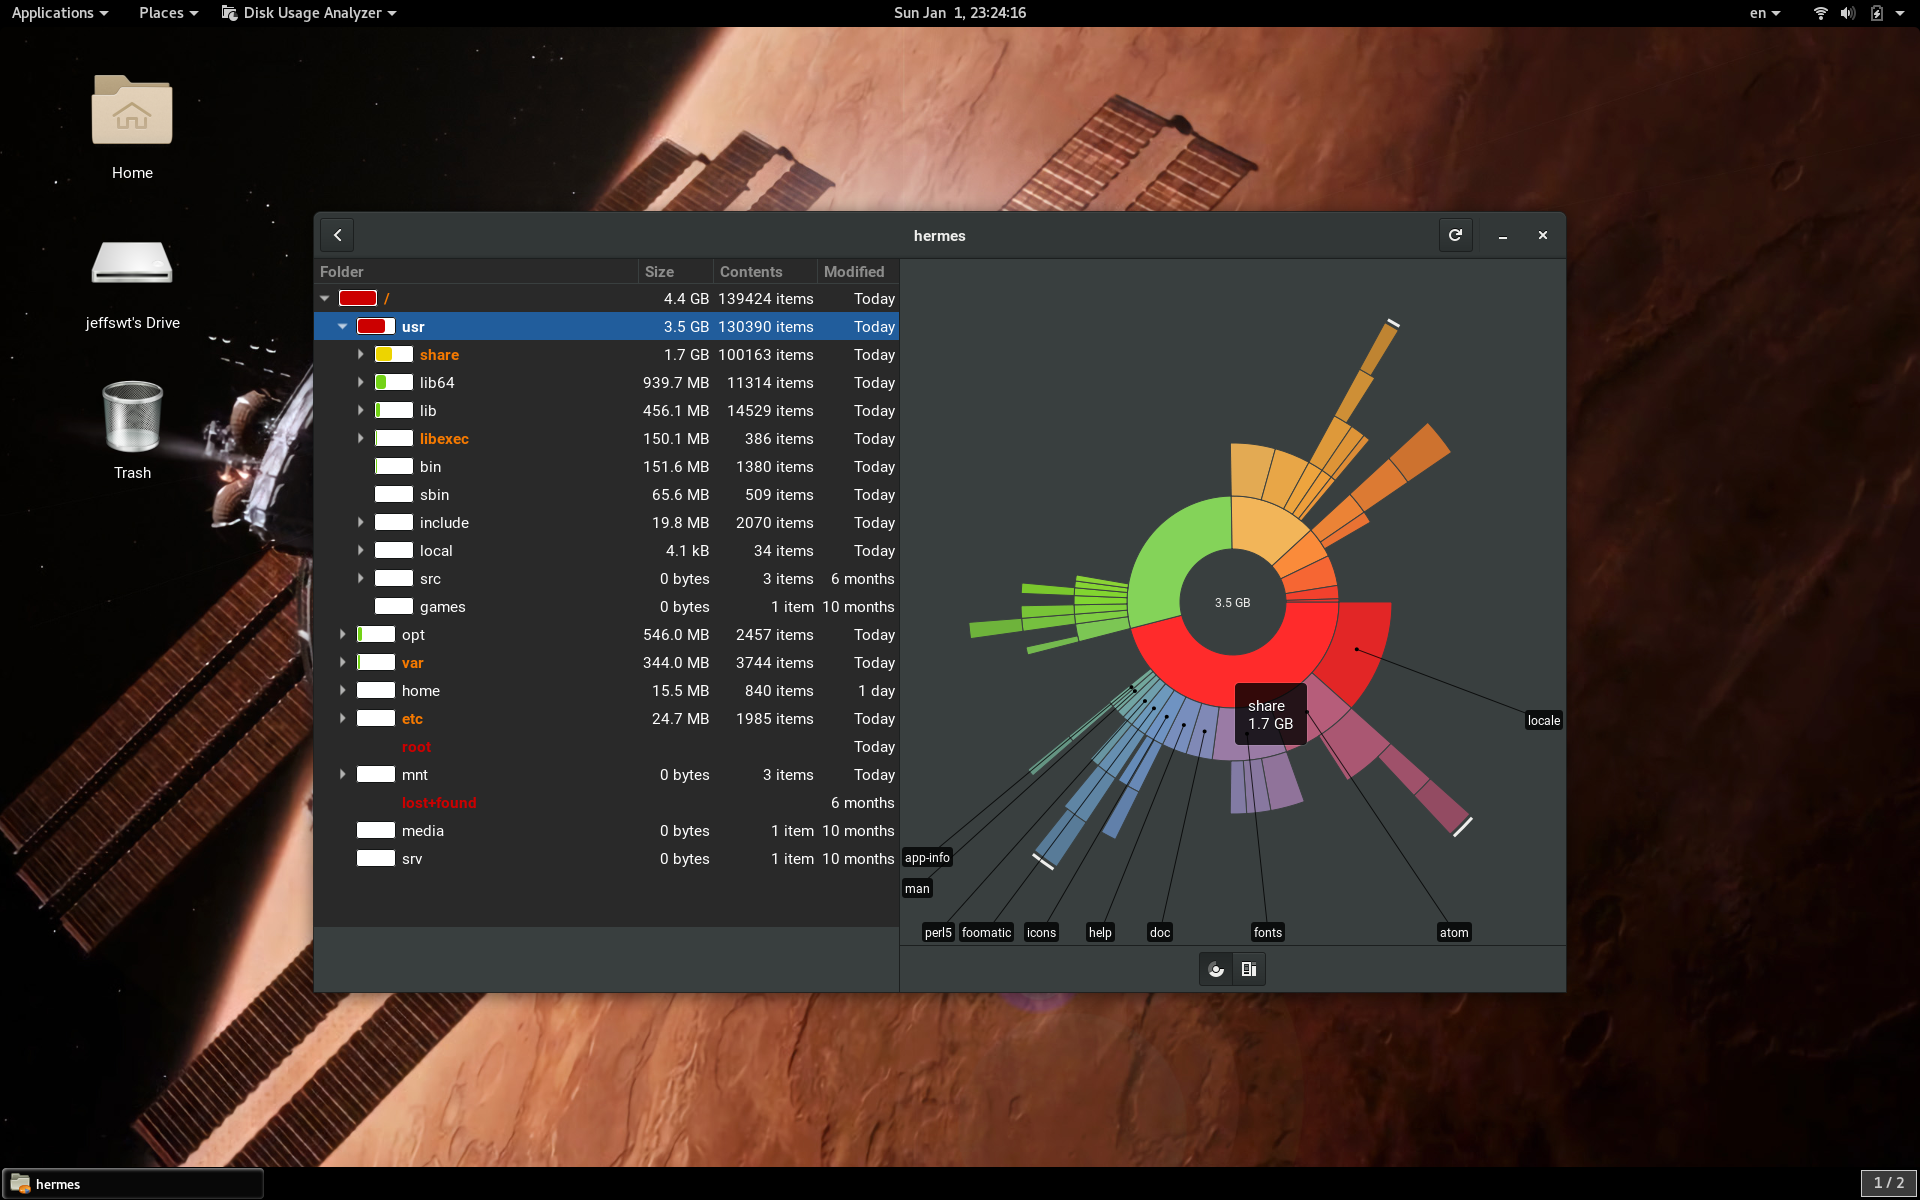
Editor Notes
The reason why I called it Project Hermes is that according to the following description on Wikipedia, it seemed that he is the guardian of travellers, in Greek myths. I would like that, though. Because I had been suffering from a variety of kernel panics and blue screens. So I expect none of the above to happen when I’ m coding on my flash drive at school.
Hermes is considered a god of transitions and boundaries. He is described as quick and cunning, moving freely between the worlds of the mortal and divine. He is also portrayed as an emissary and messenger of the gods; an intercessor between mortals and the divine, and conductor of souls into the afterlife. He has been viewed as the protector and patron of herdsmen, thieves, oratory and wit, literature and poetry, athletics and sports, invention and trade, roads, boundaries and travelers.
The other reason is that Hermes is the orbiting space station that circulates between Earth and Mars for Ares missions, in movie The Martian. I had always liked how Mark survived his near-death situation, which I am in OI currently, as half a Pro and mostly a Noob. One had always hoped that one could be like him, turning from a noob to a pro.
I am not going to upload the image to the Internet. But you can do this on your own, or help your friends to do it. We can all carry a thumb drive of our usual stuff so that we could program everywhere. It ‘s not that difficult, anyway.
You may not:
- Take this post away and claim as yours.
- Repost the photos and the related contents as yours.
- Take large paragraphs (sufficiently large, at least half of it) of the post without claiming the author.
You may:
- Re-post this post verbatim as long as the original author is noted explicitly.
- Study the project and imitate small parts while retaining your ideas. This has no restrictions on whether or not to claim the original author.
- Study paragraphs and cite them with the claim of the original author.
- Spread this post by a pointer to your friends.